
Welcome to our 52 cameras, 52 weeks photography project using vintage and retro film cameras.
Week 52 – The RB Graflex Series b
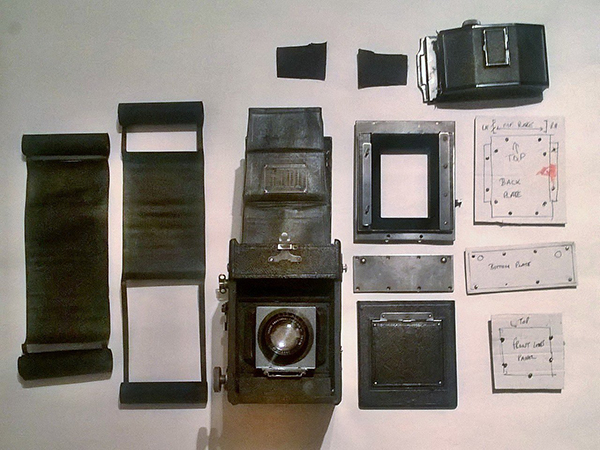
Well here we are, the final week! There is a lot to get through so let’s dive in. It may come across as a bit short hand but I need to squeeze a lot in, stick with it! Back in week 25 I had tried to feature the Graflex but it properly fell apart when the rather important cloth shutter tore in two. I vowed then to rebuild it and bring it back, little did I know what I had let myself in for.

Straight away I will introduce you to Erik Gould, I know him
from twitter and he is a Graflex nut! He, from the beginning jumped right in
with advice and help that was pivotal to what follows.
Quickly – The RB Graflex is one of the first SLR medium
format cameras, made from wood, nickel coated brass, and leather and vulcanised
silk. Held together with wood screws and glue. This one dates somewhere from
1910-25, interchangeable lens, waist level finder seen through a long leather
hood. Normally a plate film back but this one is setup for 6x9 format on 120
film via a removable cassette back. Apertures are set as normal on a lens ring
but the shutter is where it gets a little different and the root of my
problems. Simply a pair of rollers top and bottom house a long silk curtain
with 4 slots in it, it is wound on to the top one tensioning the 6 step spring
on the bottom one so when released it quickly winds back allowing one of the
slots to expose pre-determined exposure of the film, it uses the 4 differing
slots and 6 tension setting to produce 24 odd shutter speeds. That is the best
I can explain! Used by many famous
photographers and the press it has gained a cult following.
Back to week 25! I had a dead camera and no idea about how
to fix it. I had to either replace or fix the torn curtain. Curtains are as
rare as rocking horse poo so fixing seemed the only option, long story short
that man Erik jetted a piece of cloth from the USA followed by a mass of
collated info on repairs etc. I patched said curtain and refitted, now to set
its pre-tension, I followed the instructions and the bloody spring snapped!
Disaster, springs are rarer than the cloth so I was in a real fix! I finally
found a company called Springmasters in Birmingham to whom I sent the bottom
roller-spring combo to custom make one. In no time I got back a metre length of
off the shelf spring they thought might work. I measured cut and shaped it then
refitted to the body, blow me down it worked, it worked well. I set about
gluing, cleaning and oiling everything else till I thought it was ready. I videoed the curtain in action and emailed
to Erik, He thought it was a tad quick so I ran a test roll of my daughter,
sure enough underexposed and I struggled with focusing. I let some tension off
and ran a second roll, still too fast and the focus seemed to be the camera at
fault so, more tension off till I though it acted exactly like Erik advised and
I raised the ground glass until focus matched the film plain using a makeshift
ground glass out of tracing paper much as I had done with the Bronica. I
decided to leave it at that until this week. I can tell you it took dozens and
dozens of hours, sweat and tears! Also many conversations with Erik who was
amazing and I cannot thank enough, honestly a complete legend, I must have
bored the crap out of him.
Here we are then, a strange camera the likes I have never used before and just a week to get to grips, not helped by the loss of my spot meter, I would have to use my back up incident meter. I had already formed, as you can imagine a firm bond with this camera so I was keen to get it right. We were set for changeable weather in the form of storm Brian so I would shoot whenever I could and just see what came out. First roll Rollei RPX400 B&W. I fumbled around for a day or two finally getting the 8 frames and nervously developed it. It was ok as far as it goes, it proved the camera worked despite my school boy errors. Double exposure, fingers fouling moving parts, accidental misfires, bad focusing etc. There were however some encouraging frames.

Roll 2 was again a 400, JCH Street Pan, more determined to concentrate I set out for Dartmoor in strong winds and changeable light. Several hours were spent around a Bronze Age settlement trying different settings etc. I thought it had all gone much better but once developed I could see not only had I struggled with exposures with this difficult contrasty film but my focusing was off still. I decided to go with a third roll, my favoured Ilford FP4+, I gave it everything! I really knuckled down to get things right. I think I have too, I felt much better with this one and started to understand the working process, it is very different. Having just scanned these before writing I feel real satisfaction, in fact the whole 6 months were worth that mushroom shot! The Kodak lens is really pleasing and sharp enough. When using the camera there is undoubtedly a nostalgic feel, a little bit of folder, a look of a box camera while being a WLF SLR, all my favourites in one vintage package! The Graflex is staying with me so I have plenty of time to get acquainted further. I hope you see the progress in the images and I hope I can include the phone pics of the build progress. I have however rambled for far too long – 52 weeks too long!

Thanks again Erik! Also Craig for the processing advice this
week and many others, and of course Russell without whom none of this would have
been possible!
Week 51 – MY Kodak 3a model B4
I am close to the end of this project and the things I have
experienced throughout it have changed my photography. Take a look back at week
17 and you will see a camera almost identical to this, this one though is mine
and completely influenced by that week. When I first considered medium format
Em, at Emulsive film suggested a folder but I was sceptical. After getting a
few folders under my belt during this project I was rueing that decision. That
first big 3a sold me and I had to have one! Several came and went through
Russell’s shop but were not quite the one, then this one appeared, it was
broken but otherwise perfect and I wanted it, a deal was done and she became
mine!
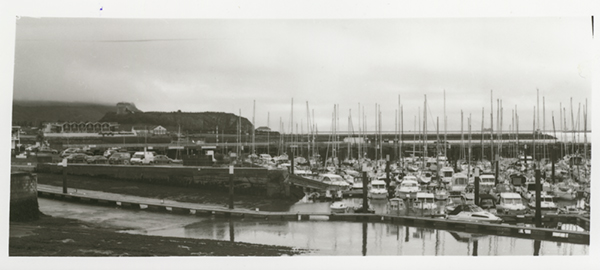
It is almost identical to week 17, c 1908 it differs in one main aspect, it is bigger! The first one took 118 film giving 6 x 10cm frames on 120 film, this one was built for 122 film with 6 x 14cm frames on 120 film. Now, it had some issues, firstly the shutter was sticking so went off to Lyndon for repair, it leaked at the back but a length of black wool sorted that. I needed spindle adapters for the smaller film, I made my own from 2 spare spindles and the core tube from a till roll. While the shutter was away I popped on a spare shutter combo and ran a roll quickly to test for leaks etc. there were a couple of issues similar to other folders I had used - Hood too small for one but an easy fix. The second was getting the film to travel flat. A couple of tips to improve this are to only advance after extending the bellows then set your shot up while it settles. Bellows are exactly that, they suck and they blow – they will suck your film forward and will blow dust on your film when closing, carefully is the answer! I went a step further using 2 measured strips of card to extend the width of the film rails stopping any forward movement. Once I got the lens back I ran a second quick roll to determine the shutter speeds, Lyndon had informed me there were now fewer speeds, no timed and bulb either. He gave me a guide to what they were. That second roll showed me how much they were out and that everything else was ticketty boo.

Here we go then, here is what I plan for this camera and how
I intend to take it forward. I want to use it as it would have been in its
heyday, at present I shoot, scan then choose a suitable image and attempt a
print, but with this I intend to go straight to the darkroom and produce 1:1
size contact prints for a scrapbook, it takes postcard size pictures for this
reason and although mine will be narrower I think it is a good way to take a
step further into the whole process, I will scan prints for sharing. I can tell
you they don’t do the real prints justice, so much detail and sharper.
I selected 2 films, Ilford FP4+ not only because it is my
favourite film but it also dries flat which is ideal for contact printing.
Secondly I choose Bergger Pancro 400 for some extra speed given a storm and bad
weather had been forecast, it also I hoped would dry flatter than the curlier
HP5+ I would normally choose. I made up a mask for printing from a piece of
glass masked with black tape to my finished picture size.
Well as predicted storm Brian played out for a lot of the
week, but I did manage to run the films in-between. It was a grey day for the
first roll and low mist for the second making life difficult. I am still
treating these as test rolls, I think I have the shutter speeds dialled in, I
am fairly close with overall exposures too. The finishing process is long so
only managed to get to first draft prints but I am very happy so take that into
consideration! The camera is clearly
happiest with the aperture closed right down with longer exposures, it gets
quite soft otherwise particularly at the edges as you will see, I need to tweak
the mask and a few other bits but very little. I tried to get 5 frames from
each roll but will defer to 4, it will be better for the whole process. I look
forward to nice slow days shooting slow images and tinkering in the darkroom. I
think for a 110 year old camera it has done well in the hands of a printing
novice. I see a lots of fun times to come.
Week 50 – Rochester Optical Pocket Premo C
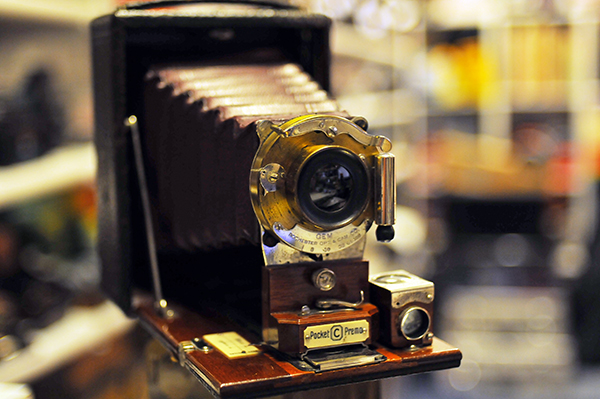
Here we are, a half century! This one is for Russell my co-conspirator. It is a little different this week but first the Camera – Russell’s new baby was made by the Rochester Optical Company, the Pony Premo is a little folding plate camera. The company was purchased by Kodak but I am not sure who made this one, it is an early one I think from around 1906 -10 ish. There are no markings for lens etc. I believe it to be a 105mm lens, focus by bellows on a sliding rail onto a ground glass hidden by a cute door. Old school marked aperture, shutter just I/B/T…I would only need T for timed! A spring loaded back takes plate holders giving an image size of 3 ¼” x 4 ¼”, There are 6 plates of which 4 were good, all housed in a leather pouch. A simple but lovely camera that Russell is rather taken with.

I said different and so it is, I would be having a go at
learning the beginnings of paper negatives, one of the oldest methods of
photography. A sheet of photographic paper is loaded under safe light
conditions into the holders. The usual photographic taking process then
developed in the darkroom producing a negative image. This is then placed over
another piece of photographic paper, light exposed through it and developed for
the positive image…that’s it in the simplest terms! Yeah right…
I lost Monday, picked up the camera Tuesday and acclimatized
myself to it. I had 2 options of paper, fresh multigrade variable contrast and
some aged grade 3, my reading told me the variable would be low contrast and
grade 4 the preferred – grade 3 it was then. I cut the paper to size as we were
just testing I wasn’t exacting. I chose a solid brick mural and setup on the
tripod. ISO 6 was the suggest starting point for the paper and I chose to bracket
the same scene at -1/0/+1/+2.

As you can see it went terribly! I developed in standard 1:9
paper developer, Frame 1 nothing! Frame 2 just went black in 30 seconds and
attempts to control the other 2 failed. I did however have a hint of an image.
I expected this to be hard so wasn’t to upset. I scrapped the dodgy holder and
reloaded with variable for Thursday. I also had another read up discovering the
paper was sensitive to blue light and a yellow filter was necessary! In the
morning I had to go to Exeter for business where after telling my tale I was
gifted some grade 4 paper, old but sealed. In the afternoon I selected a band
stand and repeated my bracketing this time -1/0/+1.

Better! I developed these in Rodinal 1:100, it would be low contrast
but much slower. 4 min each later we had some negatives! Not great but there. I
attempted contact prints to see how they looked and they were hard work! Friday
was a damp squib so I decided test the gifted grade 4 and repeat the previous
set. I set up a still life of a globe on a box with plain grey background. Same
bracketing etc. but this time I developed in double dilute paper developer.
Again pleasing results but muddy and flat. I test printed all the same to get a
feel.

I tried to improve on my favourite with some success and it
was easier than the last set

Saturday I work, so I loaded up with the grade 4 as it was
the best so far and aimed to rope a few boys in for some simple portraits. I
just wanted 3 images with the same exposure so I could: develop 1 each in paper
developer 1:9 – 1:14 – 1:19 to see if I could cut through the muddiness. Well!
I fecked it up! Simple setup, still testing so nothing fancy needed, zone focus
and we just snapped and counted.

First shot wig man I over exposed and as I pushed the
shutter arm to close the shutter I must have caught the shutter set arm moving
it to instant. Consequently the next image got a short double exposure, I
repeated this on 3 and fumbled the holder removal pulling the dark slide. What
an ass! Still not all was lost. I salvaged wig man just, I developed it 1:9
developer and that went fine. I also clicked that very first blank slide had
probably been loaded the wrong way round! So the last day had arrived, try to
make some images from what I had learned. I knew they wouldn’t be great but I
would be happy with something to show. I loaded all 4 holders and walked the
barbican. Frame 1 I over exposed and failed to save, frame 2 of the Citadel
wall seemed to go OK. I realized frame 3 was a loss when discovering I hadn’t
locked the bellows properly and the focus shifted, I made absolutely sure of
frame 4.

After all that I finish with 2 tiny iffy images, am I
disappointed? Hell no! In 5 days I have worked my way from nothing to pictures.
This is an unforgiving process made to look easy by the skilled hands of folks
like Don Kittle, they have however put a lot of work into it, so given time to
improve I see some fun exciting adventures ahead. I will be doing it again for
sure.


Week 49 – The Mamiya c330
The last couple of weeks have left me smarting a bit if I am
honest, I like to see nice images and they had been thin on the ground.
Emulsivefilm’s DeltaDefJam had come around again and I wanted to at least hold
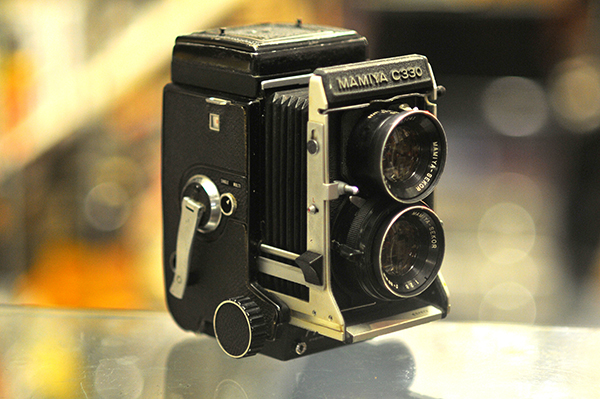
my head up amongst my peers. The Mamiya c330 was just the ticket, a 1970s TLR
aimed at the pro and serious amateur market it promised quality. 1.7 kilos of
simplicity is what you get, no meter, Aperture and shutter rings around the
taking lens, interchangeable lenses mounted on rack and pinion bellows for
focusing which holds 2 sweet 80mm lenses. You view through a lovely bright
ground glass with a fancy system for parallax correction involving an indicator
needle and exposure correction scale, simple but effective.
I intended to run it alongside the Bronica s2a which would
give me a whole bag of my favourite 6x6 images hopefully. Each would have a
pair of Ilford Delta films of the 400 and 100 asa variety. A quick rummage in
the filter boxes turned up a nice set of black and white filters but no hood.
Loading was straight forward and I was pretty confident there would be no light
leaks as it had just had new seals. The only slight question mark was the lenses
which had some marks.
The week started slowly with work and dreary weather, I did
manage an hour or so over the river Tamar at Torpoint but just 3 shots to show
for it and not feeling too inspired. It was Friday before I really got a chance
to get my teeth into it. I got an early start and tried my luck on the other
side of the city taking the water taxi over the river Plym to Mount Batten. It
was a much better day with sun, clouds and a mind willing to work. The Mamiya
made it easy, it can focus really close and equally sharp at infinity, everything
looks super sharp and almost 3D like in the viewer. It is quite however heavy
and doubled up with mighty Bronie my back knew it had been worked hard. There
are lots of boat yards to meander around plus the breakwater pier and a pebble
beach. The later was a real boost for inspiration and I found when I got down
low I could create little Micro landscapes in the rocks and pools. I was so
taken with this idea I returned on the Sunday and shot more with the Bronie.
In short it performed really well, excellent consistent
images only limited by my short comings, I did lose one frame completely but
that was me. I have to say it is a bit of a lump for a TLR and setting up for
exposures is a bit fiddly compared to others, ergonomics were not high on the designers
mind but you can forgive this given the high quality images it churns out with
ease. This isn’t the tidiest example around but it certainly performed well. I
am looking forward to the film party now!
Week 48 – The Kiev 80
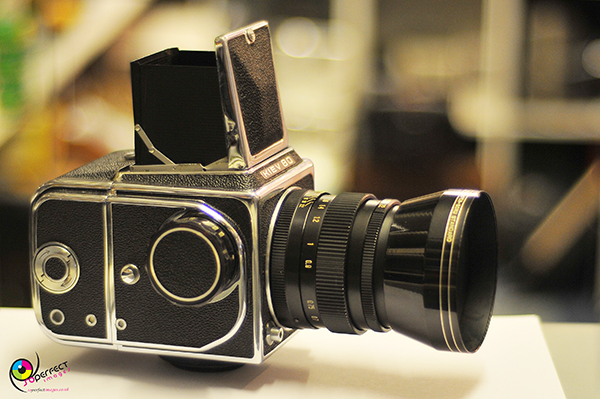
Kiev 80, or 88, or even the other several names it carried I
believe aside from a few alterations here and there they are much of a
muchness. I had the 80, mid to late 70s hunk of hammered out iron built in an
ordinance factory in the soviet Ukrainian city of – you guessed it Kiev! The
decision to run this came with several points. 1, it had given Russell and me a
headache just getting it to work. 2, a chance to sample interchangeable film
backs. 3, it came with a monster 300mm prime lens as an extra. 4, I was
interested how it compared to my own Bronica s2a as they are both Hasselblad
copies.
We will pick away at the what is on this all manual medium
format 6x6 SLR as we go along, I will miss lots so please do look it up, it has
a cult following and more is written about its quirky personality than the
techy stuff. So we loaded the first back we shall call “1”. This went wrong
straight away as the 2 indicators that should concur red or white didn’t. A
quick online search revealed I had set the counter too early! Grrr, A very
precise order must be followed > load cassette > place in film back off
camera> wind on until Frame 1 indicator can be seen in rear window> THEN
set counter > Advance and cock shutter> then attach film back! What a setup!
Anyway FP4+ was in and set, I taped the joint with dark slide removed as I
suspected light leaks having seen tell-tale sticky black lines on the dark
slide. Film back 2 was loaded with colour, Portra 160vc expired. We were off,
let battle commence…
A battle it was too, all started well with back 1. I
photographed the returning fishing boats, swapping lenses. I had a solid metal
tripod but this seemed to struggle with the monster 300mm Tair-33 prime lens, I
could sense movement. Everything in fact felt off balance and ratchety, once
halfway through the roll I untapped and started swapping the film backs around.
Then I went to put the Vega 90mm on, I had already done this once with no issue
but this time it would not fire, I removed the lens causing an unexpected fire.
It did it again meaning 2 lost frames! Then it was fine. Bloody frustrating as
I had done nothing different! It was at this point I figured out it was best to
remove the film back, sort your lenses out and cock it, when you knew all was
ok pop the back on again. I don’t think it is broken but just finicky stubborn
mule. You really have to work this camera, precisely too or it will bite you! I
worked for a few days seeing of the FP/4+ and then taping up the second back to
give it a light tight chance. I worked the shutter speeds as much as I could, I
suspect a little lag on the slower end but nothing that can’t be allowed for in
later rolls. You just have to spend real time learning the camera.
So the results are mixed, I lost 2 frames to the lens
shenanigans, and as expected there is a lot of light leakage on the untaped
frames. The protected ones are fine, the 90mm lens is a fine sharp lens and
nice to work with. The 300mm needs a faster film and shutter speed even on a
tripod, a couple are slightly off. The waist line viewer is clear and bright
and outside off its contrary nature the camera did its job. As a Bronica user I
thought it lacking in finesse, quality and looks. When all said and done it is
considerably cheaper than similar others so you can’t complain too much. It is
I suppose much like me, grumpy, stubborn, and a bit creaky > works well if
it can be arsed!
For me it made me appreciate my big Bertha, I realise I have
no real need for a big medium format lens. The appeal of 2 film backs is goer
though, I can see a real usefulness to having a different speed film in the bag
for those changeable condition. Frustrating at times with mixed results I still
had a lot of fun this week and that is why we do this? Right!
Week 47! – Double trouble!
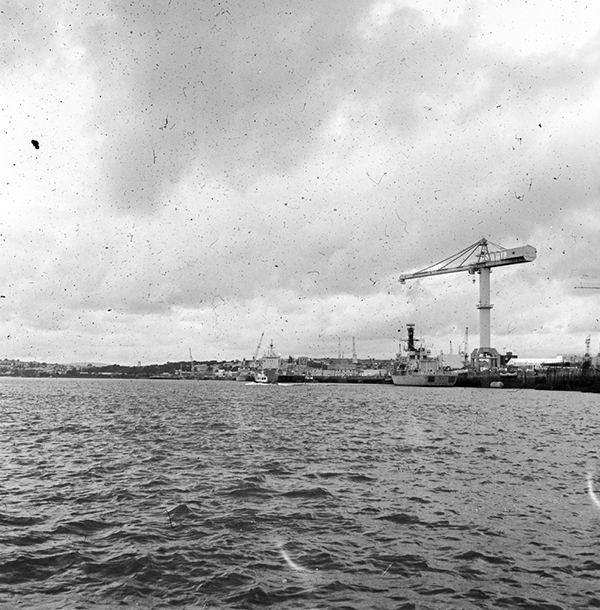
The Robot 2 iia
So Russell’s daughter Roma had gotten here GCSE results back
and they were good! In fun we teased him that for passing her photography one
he should give her a camera. Much banter later I ended up promising to shoot
anything of his choice this week if he did – he did not disappoint and tried to
make me suffer! Enter the little clockwork Robot. This will be short for
reasons that will become clear! First I needed to do some research as it is a
little different. This one is from around 1951 given that is when they started
to accept standard 35mm cartridges, however it still needed a type N take up
spool which was missing. I crafted one from a normal 35mm spool and it seemed
workable. The 40mm Zeiss Tessar f2.8 lens looked like it had been cleaned with
a Brillo pad but I have used worse! Basically there is a big knob on the top
you wind up like a clockwork key which both powers the shutter that you can
manually set from B to 1/500th and it auto advances what is, on this
type 24mmx24mm frames. The lens houses an aperture ring, f2.8 to f16 and a
guessing focus ring.


Film choice was easy as I had 3 part rolls of Ilford FP4+
left over from hand rolling sprockets. I loaded up the first one and set off on
a walk. I actually found the little thing a lot of fun! My spot meter is
somewhat bigger than it so I wish I had a better feel for sunny 16 rules as I
think that would be perfect for it, sadly I am rubbish at this so I used basic
metering. 16 frames later I knew I had passed the possible frame count and went
home. Once in the changing bag I was gutted to find it hadn’t advanced at all,
it had pulled the tape off the spool. I reloaded with lots of scotch tape.
Round 2… A much shorter walk this time treating it as more of a test, again I
enjoyed the way it worked. Its viewer is small but clear and it is nice in the
hand, it is just a fun enjoyable camera. This time it stopped on 10, sure
enough it had advanced! Sadly on developing it revealed lots of overlap. I have
scanned these for you to see. On to roll 3 – well, this is a repeat of roll 1
as it did not advance again, this time I opted to manually add half a turn on
the advance knob but in doing so I had torn the sprockets. I admitted
defeat…for now!!!! Please read on…
Part 2! Rollei Magic – last minute stand in.
Several weeks ago I had willingly agreed in exchange for
repairing my Kodak’s shutter to run a test roll through a repaired TLR Rollei
Magic. Lyndon who services Russell’s cameras had bought and rebuilt the dropped
Rollei and replaced the dead selenium meter cell, this is vital for its auto
exposure system. Without it the camera is dead.
I chucked in a roll of HP5+ planning to run it at box speed with no
filters then I would have a good idea on the meter performance without
complicating with adjustments. I set off to shoot movement for a camera
challenge, it jammed after the first 6x6 frame. I unloaded said film in the
darkroom and promptly fumbled it onto the floor and scrambled around trying to
find it! I rerolled it and set it aside. I waited 2 weeks to return it to
Lyndon who fixed it easily and on the next 2 week cycle we gave it another go,
I reloaded at his house with the same roll. I popped it into a changing bag and
advanced 2 frames, I looked at the counter and it was on 2 of 16! We had left
the 4 x 5.5 mask in! You get an option on this camera, I needed to use 6x6 as
there was no 4x5.5 mask for the ground glass so I was just going to have to use
my judgement. I will be honest I forgot several times and shot as 6x6, even
when I remembered I got some slightly off. It was however, as an auto exposure
system ideal to carry around along with the Robot. I found the focusing through
the viewing glass as you would expect from a Rollei, impressive! Making it fun
and quick to use. On developing the roll I was pretty impressed with its
metering too, loads of shadow detail and never more the ½ a stop off. The
Schneider lens was as I expected nice and sharp. There is a lot of dirt from my
darkroom floor and I did damage a couple in the scramble but that is all on me!
In hindsight I should have abandoned the Robot earlier and pushed the Magic
further testing the aperture priority option. Lyndon thinks he can sort the Robot so there
is a chance it will return. I apologise for a quite scrappy week but it is what
it is! I hope next week’s soviet incursion is a little less troublesome…but I
doubt that.


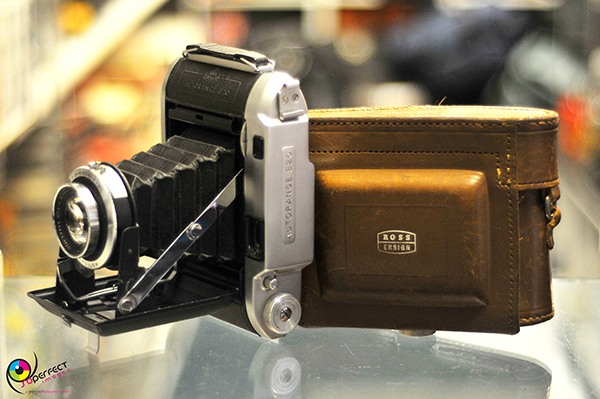
Week 46 – The Ensign Autorange 820
“That one!” Russell said, he went on to excitedly tell me it
was a rare beasty and I might never get the chance to shoot one again. I was
somewhat bemused to hear this handling the rather ordinary looking 6x9 folder.
He showed me the 2 listings on EBay, £1750 & £2100! NO WAY! I was
intrigued, so accepted it and took it home, A little research told me when new
in 1955 it would set you back £53 pounds which was over a month’s wages, about
£1000 now. That was twice the price of the next Ensign down, it was their
flagship camera. Ensign shut around 1960 with the Autorange their last design
and probably contributed to their down fall with low sales.
So what is so special
– NOTHING! Yes it has a range finder, others did. It had the high quality f3.8
Ross Xpres lens and Epsilon shutter but so did the much cheaper Selfix 820. It
took 120 film with a choice of 6x9 or 6x6 and that has a built in fold out mask
which is cool as you won’t lose it. Focusing with the wheel is nice and moves
the whole bellows. I can tell you the focus spot is good and clear in good
average light but not so much in bright or dull conditions where it almost
disappears. The “bright” framing screen in the eye piece does the same, this is
frustratingly quite some way in from the edges meaning you have to really check
what is actually in frame.
I picked Ilford FP4+ as my first roll and set up the 6x9
framing, I would shoot it from a tripod exploring the lower end of the shutter
speeds B to 1/25th. I took a walk by the river Plym where the city
abruptly meets the country side, I would walk under the flyovers where the
young folk meet and do young stuff, then cross the footbridge over the railway
lines and into Saltram House grounds finishing at the tidal marshes where
Canadian Geese were arriving on mass. It went really well, I enjoyed the walk
and slow setup for each frame. Conditions were difficult for some shots with
deep shadows under the flyovers and high highlights in the sky. I used an
orange filter predominantly deliberately leaving it unfolded the whole time
checking for leaks, there were none. Longest shot was 56 seconds, this was my
only bulb shot. I did consult with mentor Craig Pindell and a development in
DDX and time were agreed. They are I think quite nice, I am pleased! Well
exposed and sharp the lens and limp sounding shutter were spot on.
Roll 2 I decided would be hand held on a city walk, I
selected Ilford HP5+ and folded out the 6x6 mask. Off I set nice and early to
avoid the predicted rain, I switched around the filters between orange and
yellow or none at all. I used all the shutter speeds from 1/50th to
1/500th. When pushing on the filters I found the bellows unit that
moved with the focus pushed in, this was irritating. I think I managed some
fairly interesting images but I preferred the slower style of the day before. I
opted for my preferred Rodinal developer for HP5+. They again came out almost
spot on exposure wise but an annoying light leak had appeared! I think this is
when the front unit moves as you push on the filter so that needs looking into.
On the whole I enjoyed the camera, it works really well. I
had a great time with the slow stuff and it rewarded me with pleasing images.
Is it worth all that money? As a camera, NO WAY! It is good but really? As a collector’s
piece then I suppose it is, it is rare and people want it. As a user I think
there are better all-round folders I would rather own and use for a fraction of
the cost. On a personal note I found I preferred the 6x9 to the 6x6 which for
me is somewhat of a surprise.
Week 45 – The Canon AE – 1
Just because he made me shoot the fancy Nikon last week and
I know he sniffs at Canons I opted for the Canon AE-1 this week. Not the whole
story but I’m sticking with it! I actually wanted to try my hand at some
different lenses that I hear a lot about on twitter.
Let’s get the camera out of the way first and quickly! My go
too 35mm is a Pentax Me Super for those that don’t know, aperture priority in
auto, full manual able, light comfy and hellishly pretty. The Canon is fully
manual capable but in auto is shutter priority so I would need to think on
that. A bit bigger than the Pentax and to me not so pretty – but still a good
looking camera, I do like the mid/late 1970s SLR’s! The AE-1 sold over a
million units and for good reason, simple and effective it did the job for the
keen amateur and was affordable. This one is all black and nicely brassed,
rubbed in all the right places. Promising!
Lenses – I tend to stick to the 50mm or equivalent usually
with just 135mm I occasionally use with the Pentax to get a little closer if my
feet can’t. Chatter inferred the 100mm option was lighter and more usable so a
Canon FD 100 was first in the bag. Next was a wide, so many people seem to
prefer the 24/28 range over 50mm so a little 28mm canon FD was added also.
Finally the one thing I liked from my digital spell was macro, I have close-up
filters but they can be a faff! By the time you’ve hunted in your bag and
screwed it on the moment – read small moving object has passed so, a 50mm macro
FD was the last edition.
Film – EmulsiveFilm had a fresh film party! DeltaDefJam, any
of Ilford’s 100/400/3200 options so I went for the Delta 100. I popped a Kodak
colour 200 in the bag more in hope as the forecast was grim, rain rain and more
rain! Truly though I can’t complain with so many places around the world being
battered by storms, I can only work with what is put in front of me. I did
manage half a dozen colour shots but time ran out, they will follow.
Let’s do just a short over view then so you can get to what
I think are pretty fun pics considering. The camera it’s self is a beauty,
simple to learn, easy to use. I ran the full set of shutter speeds from 1000th
down to 2 seconds AND bulb! Just over half the film I zone metered and split
the remaining on the camera meter using both auto and manual, I was happy with
all and quite impressed! The 28mm I struggle with, closer up I found it useful
and sharp but found it lacking at infinity, this could be this lens itself,
maybe it is off a tad. The 100mm I made myself put on, not for any other reason
than I am used to a 50, it did well though! The apples shot wouldn’t have been
possible without it along with a couple of others. Now I saved my favourite
till last! The 50mm macro, what a great little lens! As a 50mm it does the job,
a tad slow at just f3.5 but usable. The macro was a game changer for me, no
faffing just a twist and you right up close. Easy to focus I could have shot
the whole roll just on that. It is nice and sharp and when used fast gave great
shallow DoF and loads of bokeh. Equally I did pretty well with it on a tripod
dodging rain in my back yard messing with the bulb option and the garden
fairies.
Summing up… in short - I had great fun!!!!!

Week 44 – The Nikon F5
Ok, from the off! As I write this I am still in a quandary
over this camera. Do I like it?
This is the point I tell you a little about it but I can’t!
I would be here for EVER! It has buttons, dials, LCD windows, servos and
switches everywhere! You will have to go google it but make a brew and get
comfy as you will be there for some time. A 35mm camera from 1996 hailed as one
of the best cameras in its class, favoured by press and pro’s it is as near to
digital as you get. Russell matched it up with a Nikkor 50mm f1.4 and the
Nikkor f4 300mm prime, He dropped the bomb shell it was sold and I only had it
for a few days to shoot it, he then followed it up with the 4 figure package value
and scared me. I have shot his Nikon D300s a couple of times and the
similarities are uncanny so at least I’d have a vague idea. On advice from the
twitter crowd I set the meter to matrix and started off with aperture priority
as something I was comfortable with.
I loaded a Kodak 200 colour plus straight away while
dropping a Kodak 400 ultramax into my bag, later I added a much expired
Agfacolor ct21 slide film in case I had time left for some fun experimenting. I
tried a few shots on the way home just to get a feel for it but ended up
smashing through 12 asap largely due to unknowingly catching the second shutter
release on the side with my hand wrestling its weight. Once I knew it was there
and looked up how to switch it off I didn’t miss fire again.
The following day brought a bright day and a family trip to
the Cornish coast. Ideal for me as I wasn’t overly enjoying the camera doing as
much as it was for me. I can hear you all piping up “you can use manual” and
yes I know that but I wanted to see what it could do. So! Beach, boats and kids
gave me lots to point this monster at while playing with the lenses and
setting. We had barely arrived and the 200 was gone, in with the 400. I spent
an hour wandering on my own then joined them on the small beach, poof the 400
was gone! In with the Agfa and by the time we left I had pretty much done those
36 too, you can burn film with these auto advance things can’t you. I did try
both lenses and particularly liked 300 for close-ups without alerting my girls
to my actions. I got in manual for a few but mainly used semi auto and found
that handy for snapping away with not so much faffing while out with the
family. Day 3 I finished off the questionable expired roll walking down to drop
it back.
Developing – Boy this is where it gets sketchy! The 200 went
in first, I did it all as you should and pulled it out of the rinse to find
nothing! Not a sausage! The developer had expired, I was pretty distraught and
immediately mixed a new batch then developed roll 2 way into the early hours of
the morning, and happily they worked. A few hours kip and in with roll 3, roll
3 was experimental and came out poor, I had prepared myself for that but
loosing roll 1 leaves just 25 images.
Those 25 images are causing the quandary, I was sure that
all the fancy in camera techy stuff would spoil the experience, but those same
electronic mind boggling abilities had given me a full 25 decent return with
little idea of what I was doing or what it could really do. I can see why
people rave about it. I cannot complain about weight, I have heavier. It did
everything I asked and never flinched. The 300mm lens was awesome, the close-up
on Lily’s face was from 3 meters and you can count every hair on her face even
on 400 film. Sadly I could never afford this kit but I did kind of enjoy it
much to my own surprise.
What I have decided is once this project has finished I
won’t be home developing colour. I started it for economic reasons but I have
never really been happy with the results. For the few colour I will shoot for
myself it makes sense to use a good lab and concentrate on my black and white
work. I hope you enjoy my remaining images, I did my best in the time I had.

Bronica s2a Revisited.
Cast your mind back to week 31 and you will remember I ran a
few rolls through this beauty with the hope of shooting it at my sister’s
wedding. Alas it let me down, I loved everything about this lumpy beast except
it would not focus. It would not reach infinity and no matter how crisp you got
the image on the focus glass it actually focused 20% behind the subject. Off
she went to the repairers for assessment, after much scratching of heads and
some tweaking they thought it was improved, it wasn’t, but not fixed. I was
gutted, I had made my mind up if corrected it would enter my fold. A specialist
repairer would be unviable so as a last resort I searched the web, I found
several articles referring to a foam seal under the frame of ground glass
deteriorating causing similar issues and further talk of adjusting the shims
the ground glass sat on. I set about it more in desperate hope than anything,
replaced the foam gaining some improvement then attacked the shims. Hours later
I thought I had it, the distance scale matched a measured distance, and a test
roll was needed!
Test roll 1 – Ilford FP4+ and a yellow filter fitted I took
my youngest to the park to try it out. First shot from a tripod I lined up a
seed head dead centre. Set the aperture to 2.8 and dialled in 1/1000 of a
second – MAXIMUM test! I shot the rest of the roll using Lily as my test model.
Straight into the developer and after scanning I was blown away by the results,
sharp and on point, I was over the moon!

Test roll 2 – Ilford FP4+. I let it sit for a week or two to
settle just in case the seal compressed and non-focus returned. I took her out
on a day trip to Start Point on the south Devon coast and reeled of a roll
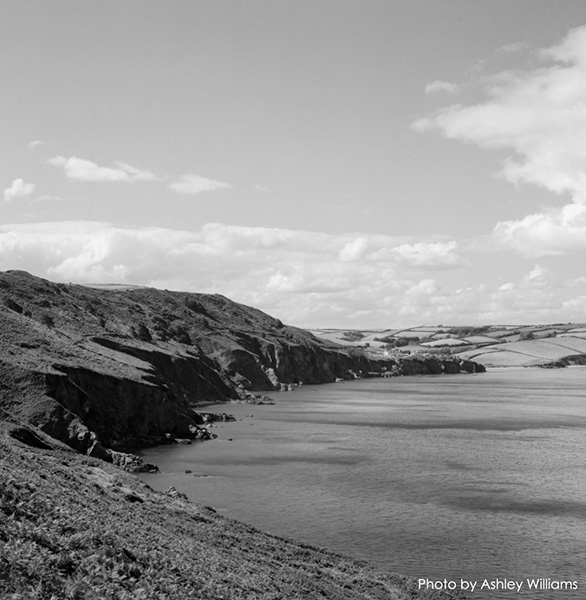
carefully, I was being really careful with it fearful of returning issues. I
need not have worried as you can see.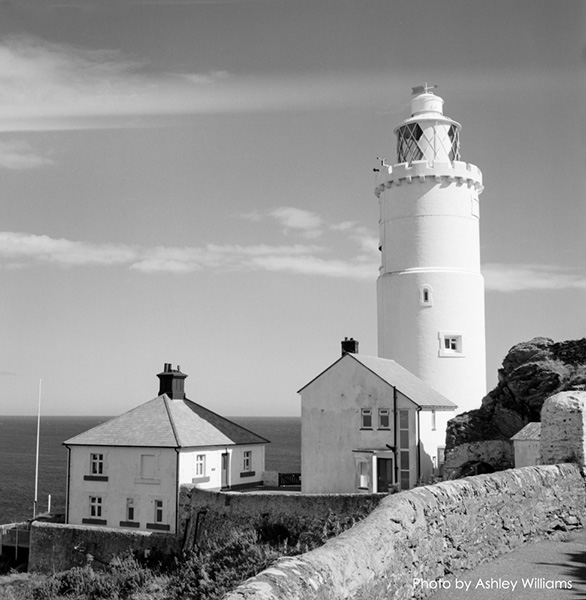
Test roll 3 – Ilford FP4+, it is my favourite. A few days
break in London was the perfect field test/excuse to throw some real life at
it, bouncing around in my bag for miles of walking, we did the usual London
sightseeing in all the places we could fit in, I noticed the weight but I can
live with that, I fell more in love with the now named Bertha with every frame.

Test roll 4 – Ilford HP5+ @1600 – This roll was more for me.
I shot half the roll at night on the Thames clipper ride back to our hotel on
the last night then finished it of once we got home. I have never had much
success pushing HP5+ so I wanted to try developing in DDX to see if that was
better, well it was! My best results pushing film speed to date!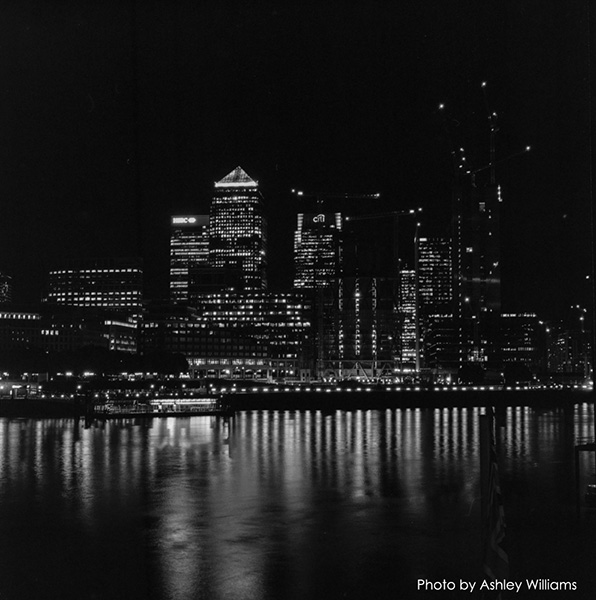
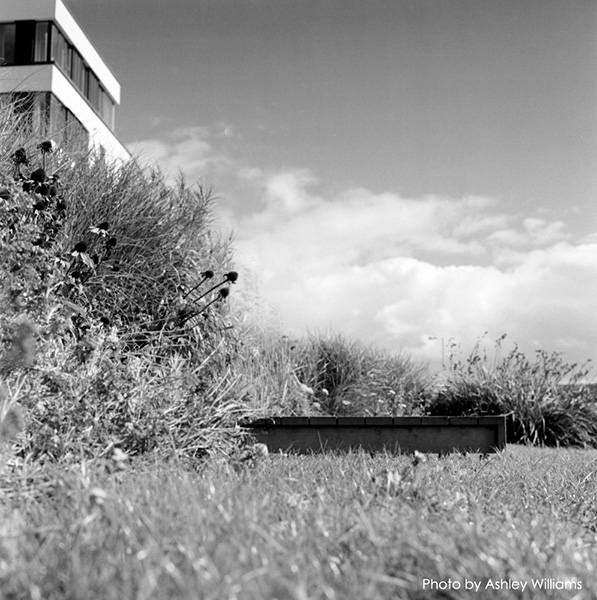
Am I happy? YES YES YES! Bertha is home with me now forever.
I think lots of good things well come from this partnership. She isn’t perfect
and I made some mistakes as I will show you at the end. She did however do
everything I asked and did it well. The shutter, while like a gunshot going off
is on time and surprisingly stable at lower speeds hand held - and the focus is
tack sharp! …happy bunny!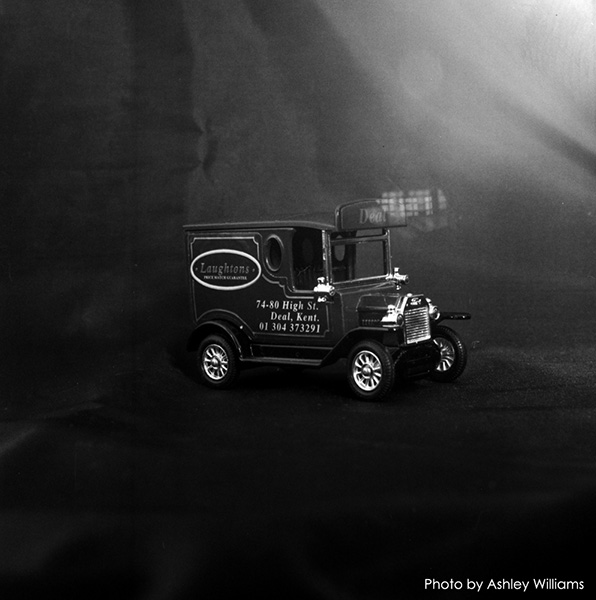
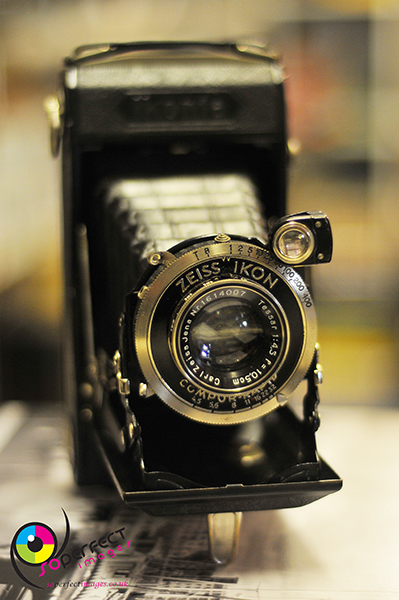
Week 43 Zeiss Ikon Ikonta 520/2
I have done a couple of Zeiss Ikons, even the super Ikonta.
But this was picked from a handful of offerings for a reason. I was looking to
test and push some of my weaker points as the 52 weeks reach the end and with a
6x9cm format I needed some practice composing the frames.
Jason Avery had set a new camera challenge to capture
movement, something in the picture had to be moving, this meant a chance to
practice my weakness of working quickly. I wanted to do it with something a
little more challenging than some super-fast auto focus SLR. So why the Ikonta?
This is a later model 520/2, post 1935 as that is when the option of the Compur-Rapid
shutter was available with its top end of 1/400th, it also dropped
to 1 second giving an inviting array of options. It also had the legendary
Tessar lens on which opened to f4.5 giving me some speed. Lastly the normal sports
viewer that opened as two metal frames on top had been replaced with a coated
glass contraption with frames lined out on it, this would be invaluable for
panning etc. The tiny bright waist viewer with its reversed image would just be
too difficult. I will add at this point that this model had the option of 6x6
& 6x9 but the 6x6 mask was missing.
Roll 1 I decided was going to be panning and freezing the
subject to use the upper end of the settings, I picked Ilford HP5+, I
considered pushing the iso but came to my senses and went with box speed. I
jumped on the car ferry to Torpoint Cornwall in the hope of some interesting
options. First shot of the ferry’s chain drive was a simple start so I felt
good. After that well it was awful! I had picked a day when the world seemed to
stand still, I managed a pan shot of a motorbike, the ferries going to and fro
and some distant gulls squabbling. Nothing outstanding though, I also managed a
couple of riverscapes in which I forgot to adjust focus completely. Next day I
took the last 2 frames with more success, the one of the BMX bike is the one
that I think I got spot on.
Roll 2 had meant to be the other way around with attention
on long exposures showing movement blur on water and such but family priority,
read I do as I am told! Resulted in a family day out to the Cornish fishing
village of Polruan on the river Fowey, it was sunny and bright so I loaded a
roll of FP4+. It is a quiet village with just a café, pub and shop and not as
commercial as the usual places around. I left the tribe for an hour on the
little beach and explored the cottages on the steep hill side rising from the
harbour, they are tightly packed with just a maze of paths winding between the
haphazard rows of vastly different heights. At first I struggled to get shots
of the views without something encroaching on the shot until I realised that
was the character of the place and I should leave them in. I had a wonderful
time resting the little Zeiss on wall, steps and rocks so I could use the
slower speeds and shut down the aperture. Again for some inexplicable reason I
forgot focus a couple of times, something I am usually good at which has
annoyed me greatly.
I am both happy with some and disappointed with other, too
many mistakes with a lower keeper rate than I would expect. The camera worked
well aside from about half a stop of lag on the shutter, nothing I wouldn’t
expect from a 70 year old camera. I got some good shots on both rolls but there
were too many mistakes so I need to work on my setup when trying to work
quickly. I am glad I did it, too often I read or hear peers say they are
struggling for inspiration or they are in a rut, Jason’s little challenges and
Sunday online chats are an opportunity to try something fresh.
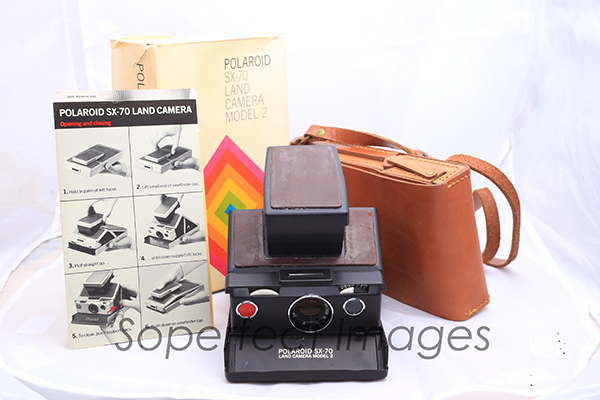
Week 42 – The SX-70 Polaroid Land camera
As I pointed out last week I was off on holiday, several
days in our capital London. I wanted something that would be easy to process
once I got back, suited the trip and a new interesting challenge that was fun
for my family as well as me. Instant film was the clear winner! Russell let me
take a decent one, a collector’s piece – the SX-70 Land camera

Let’s get through
this in instant style! Folded it is a slim camera sitting in a tanned leather
shoulder case that allows full manipulation of said camera. Open the top flap
to reveal a brown leather trimmed black body, pull up the viewer sat on top, a
second pull opens the bellowed body and a push back on the front locks it in
place. There is a focus and rudimentary exposure wheels on the front plus the
all-important trigger button. Bellow them is the slot where your picture is
delivered and the pull down flap to load your film cassette.
I took two packs of Impossible Project colour film each
giving me 8 shots and the battery to power the process. These come in at a
hefty £16.50 a pack which at a little over £2 a picture is pricey! This along
with the unpredictable quality of the final result has always been a put off
for me, in fact much to the despair of Polaroid fan Russell I am guilty of
being a bit of a film snob when it comes to instant film. Russell ran me
through the load and usage tips and sent me on my way with the fading words of
“be careful not to get your finger in front of the lens!” I did this once!

London arrival and we were off! I had several cameras of
which a couple were being tested for the final weeks of the 52 project so
mixing them all up was a bit of a challenge. My first shot was of the Gherkin
building looking straight up, it spat out the picture which went straight into
my pocket for the lengthy 45 minute process time. I waited impatiently to see
the result before taking anymore. It wasn’t half bad! A few funny streaks that
can apparently happen with this film but it looked ok!
I won’t walk you through every shot but over the next few days
I pointed at things I thought were fun, The Tower of London, Tower Bridge,
Windsor castle etc., you get the idea. I met up with twitter pals Sandeep and
Polaroid geek Martin Weston who gave me some user tips – i.e. needs to be
bright, how to use the exposure dial and after that things improved, in fact I
enjoyed it! It was a lot of fun!

Fun! That’s the key word. The type of camera, a skilled user
and good conditions can produce really nice pictures but in general the have a
70/80s feel from when these beasties were at their height. There is colour
shifts depending on brightness, a soft look but full of character. In hind
sight I really wish I had used it to capture snap shots of my family in front
of these iconic structures, instant memories of our trip. This for me is the
perfect use for these bundles of fun. I actually want one now just for those
special days, at night we passed the good size prints around the family and the
kids loved that, much better than phone shots that sit unseen! – Prints, that is
the crux! Physical touchable memories of an occasion…I am converted!
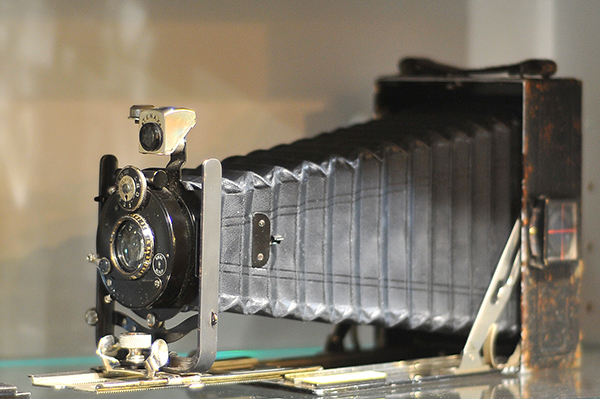
Week 41 – The Goerz Taro Tenax
This week and next week were going to be hard in that I have
planned some leave and would be leaving early Sunday, a day I normally square
up all the processing, scanning and writing. Next week is sorted with something
quite new to me and will be coming on the trip, but this week I needed
something that fitted the schedule. Russell made a few suggestions but I felt
we had been there before or that it might come back and bite me. Then I spotted
the long extended bellows on the shelf. Enter the Goerz Taro Tenax…I duped my
wife into researching it! She delved deep with this on google - c1912, a half plate double extending folder,
simple 125mm lens pairing, F stops from 6.8 to 45 and shutter from 1 second to
100th + T & B. focusing is by rack and pinion projected onto a
ground glass. It is from one of the original 4 that made up Zeiss Ikon and the
last one of the group I have to shoot. A good reason right there. Secondly it
gave me a chance to tackle the 1952/3 Ilford Ortho again, I have done all right
with it but I would like to produce a nice small set with a vintage look. Third
and finally I get another go at practicing sheet film which has been a bit hit
and miss if I am honest! So the scene is set – an old man with very old film, 65yrs old, and an even older camera, 105yrs old!…
I did the usual under red light conditions of cutting down
the sheets to 9x12 and loading 3 slightly iffy plate holders and packed them in
a light tight bag. I had said last the time
that I felt it needed to be between my previous rating of asa 25 & 50 so 32
it was. Day 1 rain! Day 2 locked into work. Finally day 3 I got 2 hours. First
frame I chose the old school building at work. I set up, did all my stuff,
checked – re checked! Took the shot… the film popped out as I replaced the dark
slide! Grump! Repeat, this time all went well and I wander down to the Barbican
and took my final frame as good as the second. You need to bear in mind that also
after this I shot 5 frames to test a Kodak conversion appearing in week 51, and
then did an 8 frame shutter test on the undead Graflex for week52, please do
tune in for that!, and processed them so I am pushing the envelope in this
shortened week! Anyway after work that evening/early morning I developed those
two frames in DDX to see if it did better and they looked pretty good, some
expected and understandable light leaks from the holders along with old film
fogging but all else seemed ticketty boo.
Test shots done I reloaded 4 holders this time. Bolstered by
the positive response to my interview published by emulsive film that day I set
off on a Dartmoor drive with the family, they were very good at putting up with
my faffing and I managed all 5 shots slowly but without hitch. I tried a
landscape but I suspect this will struggle for detail, a group shot of my girls
for something a little closer, a derelict church and an old stone bridge. All
good subjects for a vintage feel. I kept with the DDX theme when developing and
was pleased to see similar results.
Now, given the bigger negatives size scanning was not an
option so I made a small mask to help produce some contact prints and at time
of writing I have 3 reasonable prints given the films age and condition, I have
confidence the other 3 will follow suit. There is only 6 I know but this is
quite a lengthy process and time is not my friend. I think some tweaking in the
dark room and with more experience I could cut though some of that fog and push
a little contrast in there maybe but they will do nicely. I may add a little
contrast post print scan bit will leave all else as is…there is a mountain of
dust in those bellows! I got out what I could.
So, I achieved what I
set out to do. The sheet film process went much better than before. I think I
got as much from this film as I am capable of right now and the camera
performed well! It does have a bit of misting on the lens and the leather
covering is a bit dog eared but it is too good to sit on a shelf. Its bellows
are light tight and a good clean made for clear focusing on the ground glass,
it will make a great learning camera for anyone thinking of glass plate
negatives…hmmm, there’s a though!

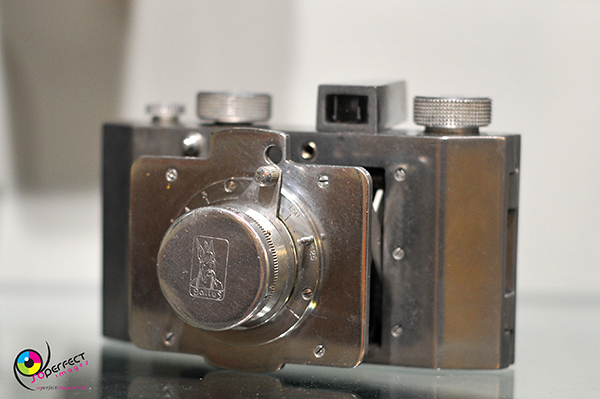
Week 40 – The Gallus Derlux
The Gallus Derlux, I remember its appearance in the shop and
I also remember Russell pointing at it a lot in the following weeks usually
with me shaking my head in answer with a slightly worried face. I don’t know
why but the little chunk of metal was quite intimidating. However I stupidly
paid the shop a visit with wifely in tow this week who spotted it and decided I
should shoot as it was pretty …argh, I had to do it now! I left with it in my
bag with Russell’s parting words of “I want sprockets”.
So, Gallus is a Jewish company that was firstly based in
Germany and were making the Derby Deluxe already, they moved manufacture to
Paris France in 1945 and changed the name to Derlux. A 127 half frame camera
made of aluminium and polished it has quite look, simple in design with distance
focus and aperture ring on the lens. The shutter release is in the front top
which is cocked by a twist of the shutter speed select knob, that has to be
lifted and dropped at your chosen speed of the curtain shutter, beside that is
another Knob for advance. On the other side on top is your viewer with a couple
of frame counter windows on the back…that is pretty much it really. I
researched on the web but there isn’t a whole lot on there so I just did what
felt right.
With sprockets being ordered I rolled an Ilford FP4+ 35mm
into backing paper and cut down a roll of HP5+ 120 for roll 2. With the kids of
school a few day trips were planned so there was my shooting opportunity. I
loaded up the slower sprockets for a forecast bright day and spent it at
Tavistock, a local market town on the moors under dark ominous clouds. I had
noticed a little lag at 1/25th when playing with camera so decided
to slightly push it up a stop rating it as asa 200, I still though really never
got above 1/75th and f8. We wandered and I snapped away where I
could metering with the spot meter, I tried to capture the feel of the little
place but it was not exactly bustling with action. Once home the usual process
commenced and I was able to scan after work that evening. They were a little
disappointing really, I was convinced the longer straight flat back would work
with sprockets but blurry spots were there in most where the film had not run
straight and flat. There were a few good shots and exposures were not too far
off but overall sprockets were not the call and the HP5+ would have given me
more flexibility. I loaded roll 2 and the next day we set of on a coastal road
trip, would you believe it we had bright sun! I could, maybe should have pulled
the film speed to asa200 but I didn’t, I found myself shooting in the 200/500
bracket at its top f18 for most of the day. We first visited the river town of
Kingsbridge for lunch where I shot several, then we stopped at the long pebbled
beach of Slapton where I quickly finished the roll shooting the family skimming
stones. Once more to the processing… Grainy! I processed this fresh film in my
usual manner with fresh developer but just too grainy for me, I can only put it
down to the smaller frame size. There is a line through many where I think the
double curtain shutter is out of time and there are a couple of scuffs where
the curtain probably made film contact. The focus was much better on these
though with the film rails keeping its passage straight and true. There is one
really wonky one where I fired prematurely but that was just a one off.
Overall I liked it, it was quirky looking and wanted to
perform well. For a 1945 camera it has a few little creases that need ironing
out in the shutter timing but it isn’t much and looks worse than it is. I think
it is the sort of camera that appeals to a collector. I enjoyed the experience,
something I probably will never get the chance to use again. So much polishing!
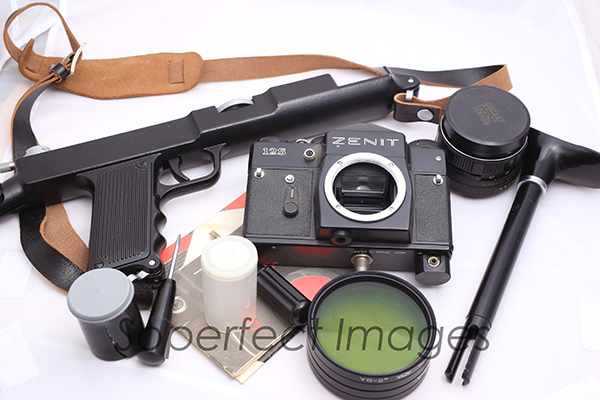
Week 39 – The Zenit Photosniper
We had a problem this week and it was mine, I had a massive
commitment to work in the form of a cricket and beer festival that was to last
all week. So after declining the use of the Photosniper for several weeks I
thought this would be the ideal opportunity to wheel this beasty out and have a
crack at sports photography. It would be on private land and I had some nice
vantage points to shoot from without fear of a tap on the shoulder from the
boys in blue or worse, finding myself spread eagle on the ground being shouted
at by armed police which did not appeal!
Why the issues in public? Well, it is a basic Zenith 12s
with a prime 300mm f4.5 Tair lens screwed on which is then in turn bolted to
rifle stock giving at a distinctive aggressive look, the original model was
designed for military use in the late 40s but this was a newer remake from
83-94, also the kit comes with hood and filters for the 300, a Helios 58mm f2
44m4 lens with some screwdrivers and bits to fill up the enamelled metal case
with leather back straps, most uncomfortable I might add!
Film – Time to process would be restricted so against my
nature I went with a colour Kodak 400 ultra Max coupled with a Kodak BW400CN, I
could develop at the same time without too much stress on adjustments timewise.
Day 1 & 5 would be the busiest so planned to do most of
my work in the middle 3. I shot mostly from the balcony but did manage some
wanders around the boundary, It does have TTL metering but I had no battery so
settled for external metering of the scenes and leaving it locked in for a
series of shots. A cool feature is setting the massive aperture ring, when
closed down the viewer darkens but the twist and cocking of a further ring then
locks it open, you focus by means of wheel neatly positioned on the front of
the stock once you have your composition you squeeze the trigger one and the
locked ring spins back to your chosen aperture a second squeeze captures the
scene. The rifle style grip gives excellent balance making hand held 1/60th
speeds simple with this long focal length. On one of my walks in I carried the
12s body coupled with the Helios like a standard 35mm and grabbed 3 frames. The
whole experience was enjoyable and interesting. The weather as usual was
changeable but I battled through.
I put them through the developer as planned together, at
first look they looked inconsistent and not quite right. Upon scanning it was
clear all were not good. My first thought was an issue in the development but
half were ok and mixed well in both rolls. I did however notice the curtain
shutter was clipping the left side while what seemed to be judder lines and
uneven exposure were visible. I didn’t keep individual frame notes but my ruff
over view ones told me the shots in the 1/500th and 250th
were where the problems lay, below that all seemed fine. The smaller lens at
1/60th were bang on so a service is already underway, thank you
Lyndon for that.
Overall I am pleased, a decent keeper rate for fast sporty
shots which given the issue is good for me in this fast shoot style. The three
small lens shots came out very well. I had fun with it and it certainly draws
attention, this is a good reason to select where you shoot it carefully or you
risk someone shooting back!
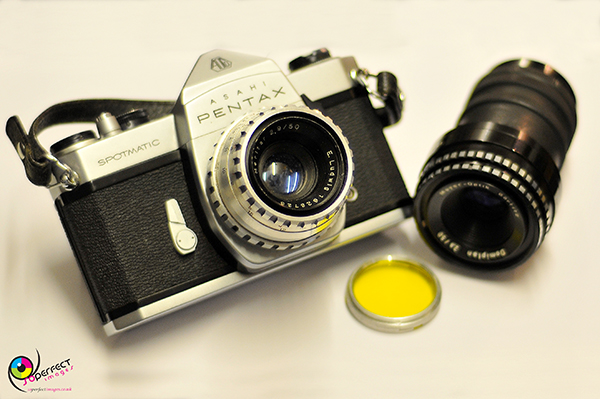
Week 38 – The Pentax Spotmatic 1964-1976
Why a Spotmatic? Well I wanted to challenge my ideas that
the Pentax Me Super was MY perfect 35mm SLR, also Jason Avery was running a
little double exposure challenge, I kind of remembered the instructions on how
to do from my ME manual and though it would be the same-ish. I pulled a couple
of m42 50mm lenses of the shelf so I could play. First on was a Meyer-optic
Domiplan 2.8, a poor effort at looking like a zebra lens. The E. Ludwig Meritar
2.9 looked the part though!
I screwed on the Meyer first with its 49mm filter thread
meaning my own set of filters were compatible and I could slip on a cokin
holder to assist in the multi exposures. With an Ilford FP4 loaded I set off in
earnest with a desire to shoot architecture with this lens for a few days then
swap lenses for roll 2…the weather had other Ideas! It took 3 days to get half
way through the roll dodging huge rain storms, I attempted 3 or 4 double
exposures but really didn’t enjoy the process that much and left it at that.
I decided to switch to the Ludwig mid roll, I am sticking to
my purposeful usage plan and felt nothing good could come from rushing through
shots to get in 2 rolls. I found a filter and hood for it which I think is
35.5mm and set off in search of interesting building, this and the Meyer lens
darken your viewer as you move the F stops up of which I am not a fan of on
35mm, The Ludwig does have a fixed roll back system that is helpful. I found
both a little tricky focusing on the spot system leaving me more in favour of
the Me Super split focus prism.
How did I get on, well I liked the camera overall, it didn’t
come close to my Me Super though, Looking at the pictures the Ludwig was by far
the more contrasty of the two lenses, the Meyer was actually very flat. I would
therefore choose the Ludwig, its looks and sharpness are better too. I was very
happy with my regular compositions, I had a few of the inside of my bag and also
one of the street I was walking along that I didn’t know about! The double
exposures! Disaster! I attempted to put my reflection in the life ring, I am
there but very faint. I tried to make the railway lines run into a post-box…but
no. I had little more success in reversing the lighthouse but on all I somehow
advanced a half frame and fluffed it and neighbouring frames. We will gloss
over those as a lesson learned not to be repeated…I shall just enjoy the nice
ones!
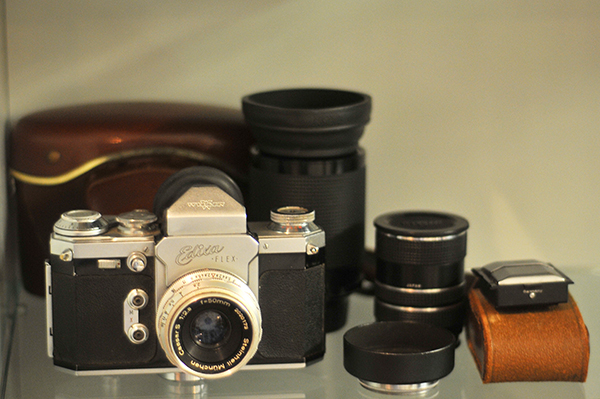
Week 37 – The Wirgin Edixa Reflex
I think Russell must have read my mind, in recent weeks I
had felt a little flat with the direction the challenge was taking, I wanted to
push my own skills forward while experiencing some great fun cameras, which was
lacking recently in the skills. I think I got that this week with the Edixa. A
late 1950s German SLR, built like a tank and similarly weighted this angular
black and silver chunk of metal felt trustworthy. Along with the standard
Cassar f2.8 50mm lens I got a set of m42 extension tubes, a Sunagor 70-200mm zoom
with both eye line prism and waistline view finders. My trusty tripod, a yellow
filter and hood with a roll of HP5+ and Kodak 200 I was set!
The HP5 was loaded immediately and I worked a few frames on
the way home. The advance sounded sweet and the trigger button on the front
felt right with a really useful sliding locking switch alongside. The following
day I had a few free hours to play so packed up the whole lot and visited Mutton
Cove one of my favoured haunts when I want to concentrate. I had a lot of fun
and learned a lot! I have played with extension tubes a bit on digital but with
film it was new, I didn’t get drawn into stacking all of them trying to see my
reflection in a fly’s eye, instead I sampled the shorter ones keeping it
sensible. Zoomy stuff is kind of new to me too, I don’t own one. I shot one at
frame with the 50 on the tripod then screwed the fully extended 200 on a
repeated the shot. I know which I prefer, see what you think? Like the tubes it
isn’t necessary to whack on 200mm all the time I found it useful at the lower
distances too. All in all a very
satisfying shoot, nice solid results with just about ½ a stop over exposure
probably due to a little curtain lag on the focal plane shutter.

I loaded the Kodak for the weekend with the intension of
underexposing to compensate for the lag. I got that bit right, but that was
about all! I did everything, macro, zoom, street you name I tried it! I just
couldn’t visualise the images. I swapped viewers to try seeing differently but
nothing, I ended up stopping on 21 and winding it off…
So, I liked the camera! Loved playing with the accessories!
And while the black and white was in I felt in control, working DoF, the
composures and planning how I would process it for my taste, as soon as I put
in the colour it just fell apart. I was actually compelled to write a page of
drivel that might have made it out before this, just a few paragraphs on how I
intend to finish of the remaining weeks.
Hope you enjoy the pics, I like quite a few, and even one or
two of the colour…
52 cameras 52 weeks…Taking stock!
I hold my hand up, I do have a problem with G.A.S! I want
EVERYTHING! It explains why this marathon project appealed, however there was
always the end goal of my learning something about myself and where I was happy
to take my photography. I am just typing away here with no planned text so
forgive my ramblings, I just want to write it down as a constant reminder to
control my enthusiasm! Here are some conclusions I have reached as to how I see
what I do over the last dozen or so weeks and life in general after.
CAMERAS
I already kind of know what set of cameras I think will fill
my bag. Apart from a few fun or interestingly quirky ones most will challenge
present thoughts if only to affirm my choices. At any time I want in my bag the
following – My Pentax Me Super, I just cannot see me not having it to be
honest! For 35mm it does everything I want and has personal meaning. The Zeiss
Ikoflex is now my favourite TLR, the Yashica 124g is better in many ways but
little Ike tugs my heart strings while making me work hard to get good
pictures. I see the failed Bronica s2 replacing the Yashica, same format but as
an SLR it gives me a different perspective and I just love how it feels in my
hand. 2 cameras I hope will feature in the final weeks that I am also, along
will the Brony hoping to persuade Russell to let me adopt, first is a Kodak 3a
red bellows which with 6x12 frame size makes for a really interesting format
and I just love the big arsed folder! Finally, the labour of love since it died
back along – The R.B. Graflex 6x9. I hope it will be week 52 but there is much
work to do. It has got deep under my skin though.
FILM STOCK
I am pretty much now sure I am going to concentrate on black
& white, primarily Ilford’s with FP4+ as the mainstay and HP5 and PanF
filling in either side. This makes perfect sense to me in my attempts to learn
the zone system, perfect my development work and take it through to wet
printing. I will still shoot and develop colour for budget reasons till the
project is finished, but after that I will be using it sparingly and sending to
labs for what I think will be more consistent less stressful results. That’s
not to say I won’t still play around with old stock occasionally.
FORMAT & COMPOSITION
Format is clear from the above, I see 35mm for fun family
stuff and those quick snappy shots while 6x6 & 6x9, 6x12 too as my solid
photographic work. Using these to capture my growing attraction to my
surrounding landscape seem favourable to me. I live in an area very much
dominated by man’s encroachment on nature and natures fight back, it makes for
stunning composures I have yet to do justice too. I the sea, the city and
rolling moorland, I see a future of slow tripod work and that excites me! Large
format is an itch I want to scratch and will eventually fall into place but my
setup isn’t ready for that just yet.
WHAT NEXT THEN?
Presently I am trying to do too much, the exploring of gear
and my love for vintage cameras satisfied by this project, coupled with trying
to forward my own work and join in the many fun projects in the wider film
community are time consuming, normal life stuff is affected sometimes So, I
will be combining them altogether, I will be shooting less and hopefully with
more meaning and quality.

Week 36 – BENCINI COMET III
I am by now settling into particular formats, styles and
types of camera I like and want to explore further. I still however have a
yearning for a folder of which there is one I have my eye on, and a little box
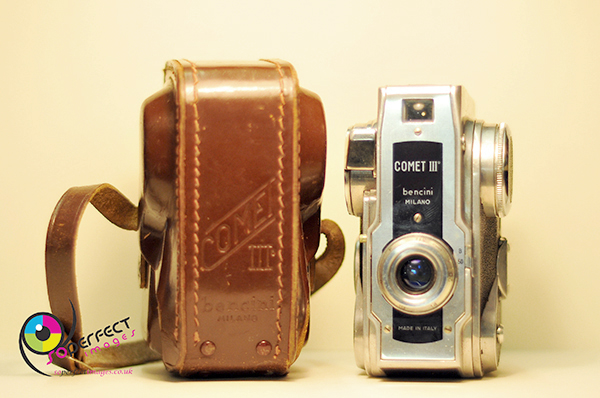
camera. The Comet falls into the posh box category. A fixed shutter at 50th
or bulb with a fixed aperture of f11, there is a focus ring on the 65mm
lens requiring guestimates. The camera itself is very stylish with typical
sleek Italian styling, made c1952 of polished aluminium trimmed with black
leatherette giving this tall thin pretty boy a classy look.
So with an eye on @SummerFilmParty I picked some film, first
up Lomography colour negative 100 expired was the only film I had that
qualified and I was prepared to risk cutting down to the 127 format it takes, then
I picked out similarly expired Ilford delta 100 I knew previously had shot
pretty well. Cutting down 120 film to 127 has risks so these were fair game as
practice rolls.
I knew the Lomo 100 needed shooting much lower than its
native 100 having shot one before badly at asa 50 so I rated it at asa 25 and
set off on a walk through town and along the seafront, I struggled to be
honest, and its slowness just wouldn’t let me get into the shadows so I ended
up concentrating on more open cityscapes. It was hard hot work in blazing sun,
I just didn’t feel it. The camera itself was nice to use but the 16, 2cmx3cm
half frames seemed to never end! I was hoping for some nice colour shifts to
compliment the Lomo film but results were flat low contrast bland images, I
felt I had let myself down. I put the softness down to the expired film but
some of the resulting compositions had me at a loss, there seemed to be a trend
toward down and to the right. I put this down to my holding position as the viewer
is directly above the lens so should be straight forward.
I loaded the Delta a couple of days later, it was still
bright but lots of grey clouds meaning I was in safe black and white territory.
I was determined to make up for my first roll and work on composition. I took a
trip over the bridge to the Cornish side of Saltash passage as a scouting
mission for future personal work. I took a little yellow filter that I could
hold in front, but the lens just wouldn’t marry up with any hoods. I used sunny
16 for exposure with a quick preliminary meter to set the tone. I worked hard
on composure! Trying different things, I fully expected some loss of shadow
detail and knew the delta would have some issues, lack of hood gave a risk of
glare but I could live with that. I wasn’t however expecting such soft images
particularly toward the edges! The down to the right was clearly there again
even with my careful framing. I was somewhat frustrated!
I have to say, given the effort in the design and styling I
expected more, lens quality was definitely overlooked! I was pretty disappointed, the simple Kodak
brownie box knocks it into a cocked hat. That said, it is a perfect candidate
for Lomo budget colour photograph that seems to be trendy once you get used to
its little issues.
Let’s quickly move on
Week 35 - Miranda MS-3
This week ended up being one of the most challenging so far. The chosen weeks camera, an Ensign Rollfilm Reflex had, after much testing, cleaning and reading up on failed me at a pivotal point of the week leaving me in a bit of a pickle.

Luckily I was running a second camera alongside for another camera challenge organised by Twitterer Jason Avery. It was to buy a camera under the value of £5 sterling. I decided I would use it as this weeks stand in camera and push a few ideas. Heres my week

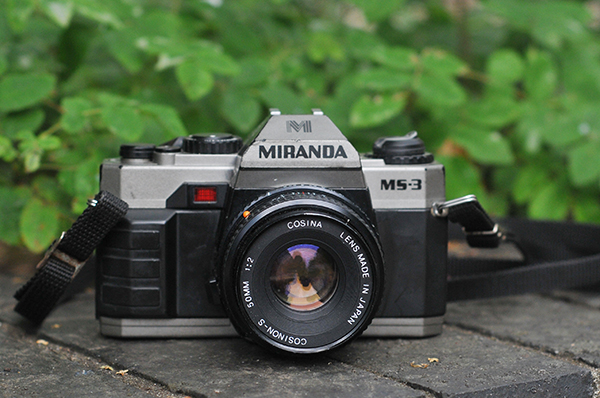
I had struggled to decide/find a camera that met my criteria, quirky – old! Whilst kicking my heals at Russell’s shop a chap came in to sell a camera, a Miranda MS 3 with a Pentax SMC 50mm lens on the front. After a look over he pointed out there was some fungus on the lens and the body was not exactly pristine so was of very little value if any. He then broke into a smile and offered the chap a roll of Fuji c200 to which the bloke agreed and Russell passed me the camera with the words under a fiver…£3.29! I couldn’t argue and accepted. I did however feel I had used my friendship as an advantage so pulled off the lens and handed that back being the only value on the camera. Once home I attached a Cosina 28-50mm zoom that I had picked up at a booty a while back for 1 due to a chip, dead centre of the front glass. I had bought it for my Pentax Me Super. Miranda kits came with Cosina lenses so a good matchup, this leads us neatly on to the Miranda.

The Japanese camera manufacturer Miranda had ceased trading in 1970.
British electrical stores Dixons had bought the name in the mid 80s and
commissioned Cosina to produce a home brand camera using that name. Cosina did
a lot of Pentax stuff so no surprise the basic shape and working of the MS come
straight of the Me Super, a 35mm SLR of aperture priority function. Similar
meter system and layout. You can shoot in manual. It is cheap, plastic and just
not as sweet in the hand though with several features missing.

The first roll in was an Ilford PanF 50asa, ideal for a sunny Friday. No sooner had I shot the first frame and my phone rang – youngest daughter was ill and could I pick her up, that was the end of that. It was Monday before I got out again with daughter in tow and between us we cleared half a roll on a tripod on a dull day, it then rained non-stop for the rest of the week so, I covered it with a bag and shot the roll anyway, I and the camera got very wet! I was pleasantly surprised by the results, some issues with the hood and rain on lens but good.

I
then took it a step further. I dug around in the spares lens box and pulled out
a fungus ruined Vivitar 135mm/f2.5, £0 and a Cosina 50mm/f2. £5 tops, remember,
the body is worthless! I popped in a budget Kentmere 400 BW and had a fun walk
that ended in the local park. I really enjoyed it, this is my standard Pentax
set up so I found it quite natural. The results were again surprisingly good,
some issues with 135 aperture sticking but hey it cost nothing! The Kentmere is
a little grainy and not a flexible or forgiving as say HP5 but it is £3.30 and
did a decent job

For a 30+ year old plastic cheap camera with budget lenses we pulled of
a good week, you could at a pinch get the bloody lot for well under a tenner
and it never missed a beat while rendering good images. To put it in
perspective the body with one lens & film cost less than a disposable camera! I know which I would choose. I won’t be
swapping it for the Pentax though!

Thank you Jason Avery for another fun challenge!
Week 34 – The Rolleicord VB
I had dropped off the Serine 105 and was just about to
enquire about the forthcoming week 34 when Russell plonked the Rolleicord VB on
the counter with the words – Can you film test that? Okay! A bit pushy lol, but
I thought why not. I had ran its more desirable sister in week 1 and had been a
little underwhelmed by it despite everyone raving about it. I found my Yashi
124g almost as good and easier to use. Then I remembered one of the first film
camera reviews I had read, a review by one of my early mentors and a man
responsible for bringing me into the film community – Shawn Mozmode! So all I
am going to say about the camera is read here! ---
Shawn Mozmode, Me and my Rolleicord. You can google it or find it at EMULSIVE
Done it? Cool, we will move on. Shawn was in my head now so
I decided to run with it. I would spend the next few days tipping my cap to a
milestone man in my photography. I didn’t want to copy him but just a hint of his
style. There had to be humour, quirkiness in an urban setting. He uses colour
and B&W, expert at the selfie and a lover of portraits. I chose 2 films new
to me – Kodak Ektar 100 for colour and on the recommendation of Sandeep a c41
B&W, Ilford XP2 400.
Ektar is a vivid colour film loved by many but it can, I
believe, be a little finicky. I loaded it up and set along with my all my
compatible Yashi hoods, filters and attachments. The sun was bright and the sky
was clear and blue, perfect for this film. I just rolled with it and let things
happen. The Cord was really easy to get on with. I loosely metered the shadows
and played with composition and colour. I quickly realised why I had not been
impressed with the Rolleiflex. It had been hyped as the god of TLRs and it was
never going to reach expectation. This little fella however with its simplicity
just felt right! I put the film through my usual process and while not perfect
with a few iffy ones, they are probably some of my best colour work. It left me
thinking maybe I CAN shoot colour after all!
Next up the XP2, I love my black and white film process and
this film was off my normal track, developing as colour seems alien and not
having the control in development was a bit scary. I couldn’t have been luckier,
the sun vanished and nice cloudy skies appeared, perfect BW territory for me.
Again I metered the shadows letting highlights fall wherever. I had 2 hours of
fun! A little silly at times but hey! I shot a few selfies, mixed in some bikes
for Shawnee but alas no portrait presented itself. Now, you might see a few
damaged areas on both films, TBO I had a mare of a time loading tank reels in
the humidity. I struggled post editing the WB on the XP2 and ended converting
to BW in lightroom but I am pleased overall but really it is hard to see it
fitting my work flow.
The Rolleicord is a great little camera giving much more
bang for your buck than the flex. I would even go as far as it being better
than my Yashi! I hope I haven’t done you a dis-service Shawn and thanks for
your support!
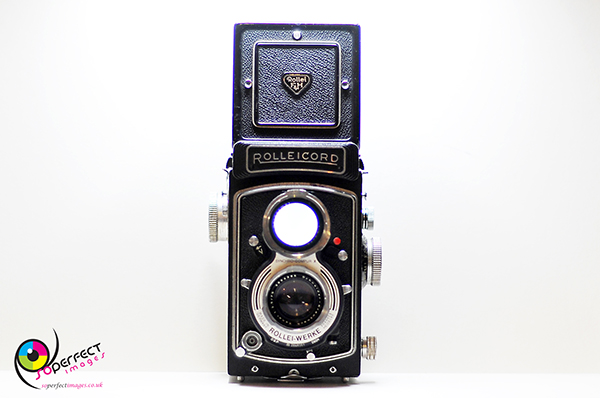
Week 33 – The Sirene 105 - possibly
Every little plate camera that arrives at the shop I have to
touch and play with, I have since the Ernemann resisted! I buckled this week
when Russell plonked the Serine 105? in front of me. Why do I question it, well
it is marked up I.C.A. AKT GES Dresden. The model name is supposed to be on the
handle but that is missing, other very similar models were, around the 1914-26
time, the Volta and the Lola but they had too many inconsistencies. The setup
it has according to the ICA site I found puts it around 1920. A pull out
bellows plate camera for 6.5x9 plates, it is the budget version with just 2
lens elements that screw in front and back. This by the way I read gives 3
options, normal or reverse them for macro and lastly just the front one screwed
into the back for close portraits. The other budget point was it only ran f11
-12.5-18-25-36 with shutter speeds of B-25-50-100th. My opinion is
the shutter is too fast for the apertures available but what do I know.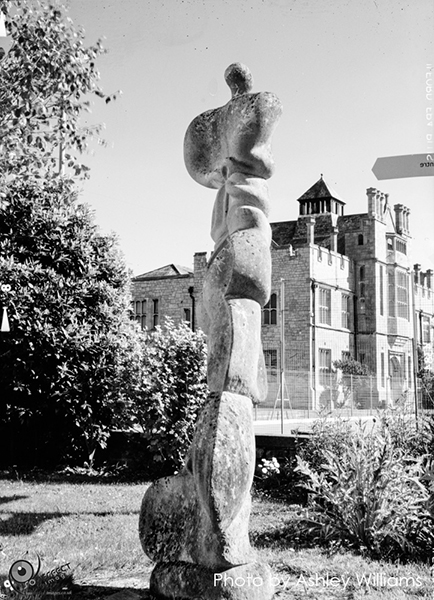
All I wanted from the week was to practice my previously
poor sheet film work flow without busting my wallet. I decided to give the
1950s Ilford Ortho first crack as I could set it all up under safe lights. I
left in the glass plates to support the film and all went well! So, next day
after my work runs I grabbed 2 hrs just sat by a jetty carefully going through
the motions and scribbling madly. I rated at 25asa which meant multiple
exposures. It didn't go particularly well to be honest, I either missed a point
or forgot something, e.g. the out of focus ring, I did everything to the
letter! Except bloody focusing! I swore to correct that on the next set. I
developed in DDX, they are OK with that aged look but don't really do what I
wanted.
Set 2, I decided to cut down my favourite FP4, I replaced
the glass with black card as I thought it was causing light problems behind the
film and I cut card stays to hold down the film corners to stop jamming. This
was all fiddly in full blackout but I did it. Saturday we had to pick up
daughter 2 from Dartmoor so while waiting I set up a shot, did everything right
but when pulling the dark slide the holder came too! First bolloxed. No more
that day. Sunday I had to work, a friends christening and they agreed to a
portrait. I got nervous fluffed the dark slide replacement and blew it, take 2
same shot, got it all but missed the focus. After I settled in a small on site
garden and tried the close-up shot again, slide issues again! I was stressed
now! I took a knee, had strong sweary words with myself and hit the last 2 with
total commitment. I dev'd in DDX again in a standard tank and got as suspected
3 from 6. ALL worth it for the close-up shot.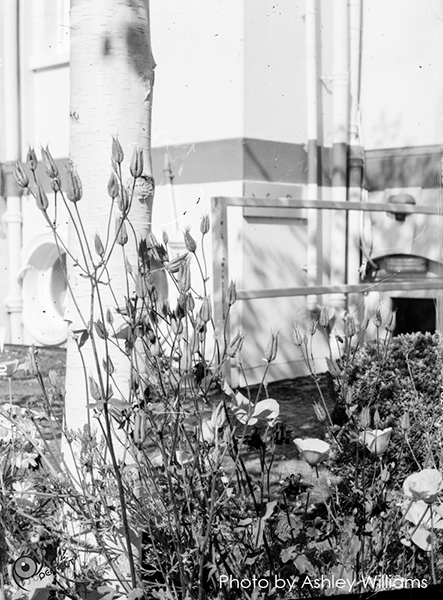
The camera works. It works well when used correctly. I have
however much to learn in this style of photography. It pulled me back a peg or
two and rightly so. No doubt another chance will come and I will know more but
for now you have little to view. Sorry!
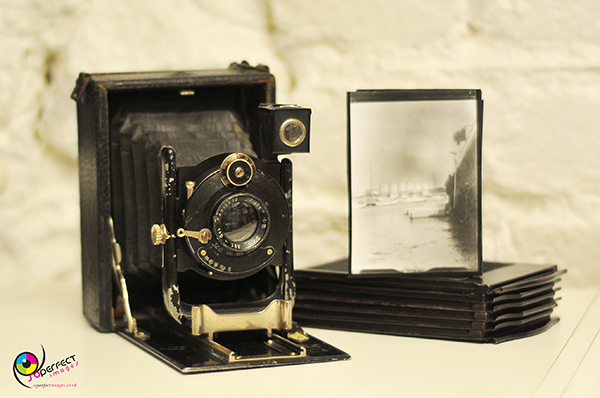
Week 32 – The Yashica Minister II
A bit of a fluke this one, and probably the right camera at
the right time! I was hunting through boxes looking for a particular Yashica
Electro 35 for Russell… which he had right next to him btw, just couldn't see
it! Anyway, I saw what I took to be the 35 and pulled out what was the Minister
II. As I held it I kind of liked its look, typical mid-60s, 35mm brush steel
and black body, an all manual rangefinder and not a battery flap in sight! I had
a scary looking week with sis's wedding with all its planning, stuff at work to
do, plus the weather was forecast, and bore out to be miserable! No
@summerfilmparty for me sadly. I decided to chuck in a colour roll and use the
on board E.V.L system, to see how it turned out then if there was time run a
second. I would meter off camera and compare the two. As I ran that first roll
of 1 year expired Kodak 200 it became clear a 2nd was just not going
to happen so I mixed the 2 methods up to see, without notes, if I could pick
them out. Lets clear that one up now, I couldn't. To be fair the weather was so
bad I think the scenes were pretty evenly lit so shadow detail / highlights were
not an issue, perhaps more contrasting lighting would be a different story.
I found using the Yashica Minister fun, pretty quick and
easy, an ideal little carry camera particularly for the all manual lovers. All
the focus and exposure controls are on the 45mm Yashinon lens, the focus ring
has a handily placed protruding thumb piece making for smooth pairing of the split
image in the big bright viewfinder, the yellow centre spot is clear even in the
dull horrid conditions. Exposure is a joy, set your film speed on the meter
window, point at your composition and read off the EV number and dial it in on
the ring at the end of the lens. Then with the ring just behind that choose
your preferred available match up for your requirements of speed, DoF etc. It
really is super easy! If you want to spot meter then dial in your required
speed then turn the EV ring until your aperture value comes into line.
It wasn't all plain sailing, aside from struggling
motivation wise in the to the skin soaking perpetual drizzle I forgot to allow
for parallax correction far too often. I found the shutter release button super
sensitive and fired just before I was ready a couple of times. The train is a
prime example, I had to be quick so estimated distance, gave it a stop extra
from the shot just taken, poked the lens through the fence and hit the shutter
release. NOTHING! I had gotten into the habit of not advancing till ready to
avert misfires. So I advanced and patiently waited for the back and promptly
misfired!
The resulting images given the weather, lack of interesting targets and my dire efforts with colour are pretty good, the camera performs way better than expected. The lens is sharp, it is light and easy to use. It made what could have been a washout kind of fun. If I see one going for a bargain, and they are nice and cheap! I would find it hard to pass up.
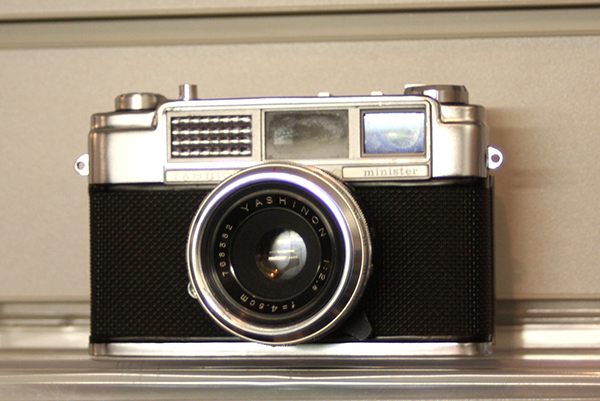
Bronica s2
I know I only did the Bronica ETRS a few weeks ago but I have good
reason for revisiting similar. Firstly, one of the reasons for this year long
G.A.S. indulgence is to find what I like, how it might suit the direction of my
hobby and fit my work flow. Second, my sister has asked if I could cover some
photography at her wedding…NOT I might add as pro type photographer and while
most will be shot on a digital I wanted to mix in some film. The Bronie s2 as a
6x6 would be easier than the ETRS's 4.5x6 when it came to composing the shots.
Third, I have been questioning why I own 2 TLR's and would something a little
different in MF give me fresh approach! Lets see…
With the wedding in mind and my complete terror of this responsibility I
decided to shoot in a certain way, those closer to mid-range shots that would
be required. Having several colour rolls, chemicals mixed I chose the dreaded
colour for the first 2 rolls. NOT my comfort zone, both a little expired and
have given me a headache before with colour shift. Roll 1 was Kodak Portra
160vc which I would shoot and develop as normal. An afternoon family day at
Saltram House gardens in the sunshine would give me plenty of interesting possibilities.
Roll 2, Kodak Portra 160nc which I would rate at 400asa and pre bath in
Rodinal, something a few have been talking about on twitter recently. I also
shot a 3rd roll as portrait practice, an FP4+ that I hoped to shoot
on the day and roped my 2 available youngest in as models… I have included a
few below.
I will admit this behemoth monster of a camera really caught my eye. She
has sweet lines, classy chrome trim on the fat black body, no fuss, no
batteries, just a straight up and honest MF SLR, 4lb in weight so heavy, but
lovely in the hands. Easy to manoeuvre the focus ring on the 75mm Nikkor lens
which at f2.8 is fast enough! Couple that with a shutter speed topping out 1000th
and running down to 1 second there is ample play time right there! Removable
film back for 120 & 220 with a Polaroid option out there I saw lots of fun
ahead!
I really enjoyed using it, it felt playful, comfortable and quite
different from the TLR. Small issue with the advance, wound on fine, frame
spacing good on 12 of them but insisted on 2 false frames every roll that wound
off! Odd, but talking today to an experienced repairer it is likely to be a
quirk to that particular back and shouldn't present a problem. The results were
however more concerning! I had missed focus across all rolls… not by a bit but
by a few feet. Beautifully sharp but not where I wanted it! PANIC! I really
thought I had lost the plot, maybe my eyes? Maybe I just wasn't seeing it right
on the ground glass? Anyway today I had to assist Russell retrieve stuff from
the above mentioned repairer who took a look at Big Bertha and immediately
spotted that the critical focus was way off along with infinity focus, he can
reset it so this isn't over just yet. I will keep you posted! In the meantime I
shot most of the below pics knowing where I was focusing but to the unknown eye
they are ok. Take a look.
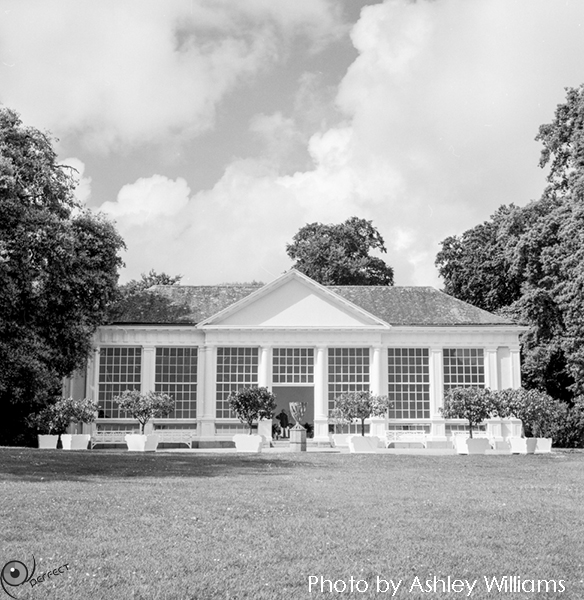
Week 30 – The Ricoh 16
This Ricoh 16 is one of those little fun cameras Russell likes to pick
up when he can. He definitely has a tendency toward the quirky and this fits
the bill! A tiny little sub miniature that you can slip into your trouser
pocket if you wear the looser fit like me. I am a comfort over style man! It
isn't a toy camera at all, well made with nice looks, it has a full range of
apertures on a lens ring. A tiny knob on top gives you speeds of B, 50, 100 and
200. You focus as a distance finder again with a setting ring on the detachable
lens, yes there are interchangeable lens options. Made in 1959 it has the black
and silver look of the period which for me was more appealing than the
preceding golden option which was a bit too much bling for my taste.
The film – this may have presented a problem, as the name suggests 16mm
is what is required and there was none to hand immediately but as luck had it Terry,
Calor-gas-Terry, posted on twitter he had bagged a couple of 200 foot reels of
1980s HP5 movie film, a quick conversation and he returned to purchase me one
for the princely sum of £2 which he gifted me… what a nice man!
The next problem, fun part! Getting a piece of a 200 foot reel into a
tiny reloadable cassette in pitch black I figured would be a challenge. I cut a
test piece to practice loading in daylight which went well so off to the
darkroom with ruler and scissors. I estimated the 20 frame lengths the camera
can hold plus spacing and ample spare to cover my ass, approx. 18 inches. I
will not bore you with details as it would be lengthy but! Many cassette parts,
curly film, sweat, cursing and growling I got it in and sealed up and ready to
shoot. It was fiddly, you have to do it accurately but very doable.
Shoot day – I rated the expired 400asa film at 200 and set of on my
usual travels metering quite loosely with my spot meter and just freely shot at
things at different distances trying to mix up the settings to see what it
could do with the intention of the usual second roll improvement. It is marked
up for 20 frames but you can choose more, or less as you wish. Once done I
developed with my preferred HP5+ method 1:50 Rodinal for 20 minutes.
Results – I was expecting really grainy images given the tiny 10mm x
14mm frames coupled with expired HP5 but they weren't too bad being less
noticeable in the busier close to medium distance shots. It focused well and
exposures were ok but next time I would probably rate at 100 asa. The one thing
I did notice, and it may be a quirk of the size and 28mm lens length, but
parallax error occurred in the distance shots, I know I had the cricket
pavilion dead centre with wriggle room! Odd, close-ups were bang middle with no
correction on my part. Also the image you get is smaller than what you see in
the viewer resulting in some chopping off which was annoying.
Summing up – With some unsurprising fogging on the 30 plus year old film
and no filters to fit to change it up a gear I didn't run a second roll, I got what
I needed from the first and really didn't think I would get anything from
running a second. It is a bit of fun, an experience but not my cup of tea. I
struggle to see the practical use of it but maybe there is none, it is just a
fun and quirky camera.

Week 29 – The Kodak Box Brownie No2
Why another Box Camera I hear you ask? Yes I know we only
did one 2 weeks ago. Jason Avery on twitter had come up with a bit of fun
#boxcamweek and it sounded fun. I had really enjoyed the Coronet cardboard
jobby so why not have a go at another. Russell let me rummage through his box
of boxes, all a bit rough and ready but I pulled a rusty mucky Kodak Brownie
number 2 out that needed a spruce. I took it home. I scrubbed away the rusty
edges with the back pad of a dry sponge, glued the curly leatherette covering
back down then polished all the exterior with balsam wax. I gave all the glass
bits a going over with white vinegar, the fixed lens came up well but the
bright viewers were not great. Inside got a good clean too, the rust removal on
rollers with a careful lube.
Camera now looking grand with an aged look we can go through
a couple of differences with the Coronet. The Kodak body is mean to be
aluminium but the rust says not! Shutter is faster at 1/50th and a
slide out plate with holes stamped in for aperture options of F11-16-22, which
is about it really.
Roll one – the usual FP4 was loaded and I did a few test
light evaluations, the loss of a stop of light with the faster shutter made it
hard to get a shot in with any filter for effect even at f11 so I decided to
have a crack at multiple exposures across the whole roll. In fact all were x3
accept the sundial which was x4! The one of the street scene looking at the pub
a meagre x2. To be honest I wasn't overly confident with my math re exposures
so a very tense time through developing, I need not have worried as they were
pretty damned good! I hadn't done too badly with composure either considering
the viewing glass, the tripod was a must!
Roll 2 – HP5 for a change of pace. At asa 400 it gave me a
couple of stops of light to play with so set about a day of single exposures. I
just wanted a day of taking photographs so jumped on the foot ferry to
neighbouring Cornwall and Mount Edgcumbe Country Park and just had fun. I thought
I had it all in hand. A great historical place set in lovely woodland, open parkland
and right on the Tamar River bank. I am going to pick out one picture in
particular – The Folly tower looking over Plymouth Sound with the city in the
background. I have taken this view in my digital time and really wanted it on
film. I was lucky in that stormy skies added some drama and I could just about
justify the light orange filter. Here is a fun fact. The folly was built from
the stones of a couple of ruined churches of Plymouth in 1747 by Baron Richard
Edgcumbe. It was built complete then the story goes he ordered it to be
distressed by using gunpowder. They over did it a tad and dropped it completely
so had to rebuild it again! Anyway back to the roll, I knew I had on a few
frames accepted slight under exposure so wasn't surprised with a few dark ones
after developing so a little post tweaking has been done. I am confident I
could print them so I won't be beating myself up. The folly shot is as though
and I am very proud of it indeed.
Summing up? Nothing but joy, good honest images with a look
of their own, not razor sharp but who cares! I am now looking for a nice box of
my own. I had to work the exposures a little but that is the fun part…loved it!
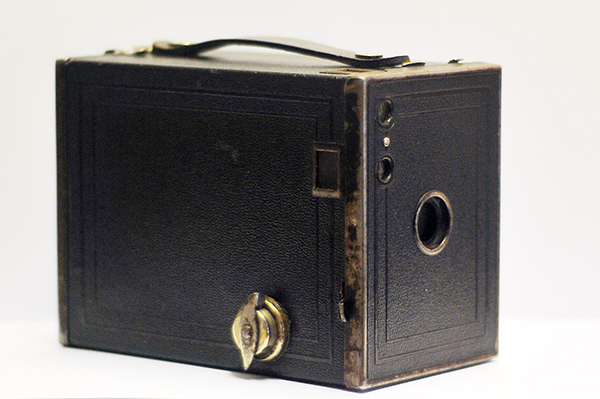
Week 28
George Hare Improved Field Camera
Normally I get a camera, chuck in a roll - develop and scan
– assess then repeat in the hope of improving and learning something along the
way. Well this week is a little different and honestly a lot earlier than we intended!
We don't normally plan but Russell part purchased this old girl some weeks ago with an
idea to research, tweak and repair its case then test before deciding if it was
going on the shelf. When he first got it there was no makers name to help
identify it. A lengthy trawl of the tinternet revealed it as THE GEORGE HARE
IMPROVED FIELD CAMERA. Built between 1890 and 1899, a large format bellows
plate camera made of wood, brass and leather. The compur shutter on the front
probably replaced the original curtain shutter, its housing being in the box
now replaced with the more traditional type on a front plate of wood which
doesn't quite match the quality of the rest of the body. The lens is brass with
no name or size on it but I guess 4 inches-ish or 100mm in new money. It came
with 5 double sided glass plate carriers now neatly set up with black tin sheet
film cassettes for 4 ¾ x 6 ½ inch in size.
The film size presented a problem, had it been 4x5 or 8x10
then buying a pack would have been ok as it would get used up eventually but
the odd size might not raise its head again for a good while. There was however
a pack of film in the case! It was Ortho and expired in the 1950s! Yes 65 years
ago, this could be problematic but hey, worth a shot. I took the pack and a
holder home to attempt a load. A quick google told me Ortho film could be
loaded under safe light conditions which was a bonus, being able to see what I
was doing. Next day back to Russells and we went out to shoot it. We took the
nice wooden tripod and I set about taking my first LF pictures. I did
everything I thought I should, focusing under a makeshift black sheet I stole
from wifelys fabric stock using loupe, making notes on EVERYTHING! Loaded
carrier, pulled back dark slide…pop! Done, repeat, I thought it went well.
Straight home to develop. Now, I had tested some film off cuts prior and there
was some fogging. After a chat with film gurus Erik and Craig a suggestion of
using paper developer to cut back the fog and add contrast was offered as an
option so I gave it a go, again under safe light meaning I could watch it
unfold! Unfold it did… very quickly…too quickly! They went very dark. I would
normally scan here but I can't at this size so straight to contact print, and
they printed OK!
Process proved I got 2 holders and loaded 4 new sheets, this
is where it gets sketchy, I came down with a virus, I spent 3 hours over those
4 shots dodging rain and feeling increasingly awful, the final shot was a real
effort to concentrate. The following days were somewhat blurry but I developed
the first one in a more diluted version of the first but that was way too weak
so I went for plan B, a 1:15 Rodinal mix which I found I could control by eye
and ended up with 3 fairly good negs. I was at this point suffering fevers lost
voice etc. and had no drive whatsoever. Last night, Sunday, I knocked out some
feeble prints and viewing this morning I am compelled to do them again tonight.
Hopefully when you read this there will be 5, maybe 6 reasonable scanned prints
to see below.
For a first foray into LF on a strange 130 yr. old camera
with much expired film I think I did ok. I learned a great deal and had fun to
start but sadly fate dealt me a curve ball and spoilt it a bit. Using the Ortho
film under safe light conditions was a highlight, a rare chance to watch the
whole process unfold. Then going straight to print allows me the fun of saying
for the first time – I made a photograph!
Update – a heavy waste basket and several hours later it is
clear that my skills, read lack of! Just are not ready for these difficult
negatives. I am not disappointed, I am lucky to get images from 65 year old
film left in a loft. Strangely the 2 first dark images printed best.
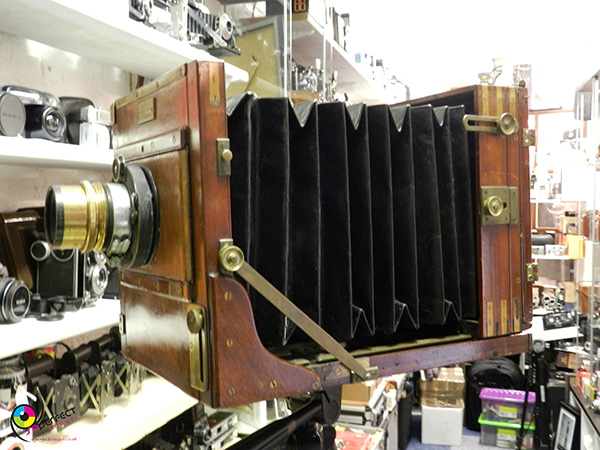
First, I have said I didnt want this to end up as camera reviews and I always end up babbling on about this and that so I will try not to! So, the lubitel is from the USSR – Been around since the 50s, still made by Lomography as the 166, it is plastic and basic! Google is your friend.
They made millions of these bloody things and I had till now managed to dodge the huddle perching on Russells shelf but he got me this week. I dont mind a toy camera, they can be fun but everything I read insisted this TLR was not a toy, more a basic amateur camera…Lubitel translates to amateur apparently! No matter I had it now so I would make the best of it. I have recently dipped a toe into the darkroom and those in the know tell me I should be honing my skills on producing good negatives so I will be using a lot of FP4+ from here on in fine tuning my exposure and development…that is not to say there wont be the occasional transgression. Both rolls this week are FP4, developed in DDX at 1:6 for 10 minutes. I will be metering with a spot meter as usual.
Roll 1 – I didnt get the camera until the Wednesday and didnt load the 120 until Thursday due to a busy work schedule, even then I only managed an hour out at Radford Lake where many old wooden ships rest and rot. I kept everything simple with just a makeshift hood and the usual B&W filter glasses. I hand held or rested on flat spots for anything under 1/60, I tried a few Shallow DoF etc. and it wasnt too bad, I found the shutter release awkwardly too close to the cocking lever so used a cable release from then on. The big bright viewing glass is great for composure but the ground spot in the middle for focusing, even with the little pull out magnifier is just useless and I ended up using the distance scale on the viewing lens. Saturday I took 3 on the way to work then managed a clumsy double exposure and finished off exploring a couple of 7 minute long exposures that did not really come of that well. The rest? Well, not bad! Quite good actually, swirly bokeh, reasonably sharp and not bad exposures… I was surprised! Incidentally as a side note, the castle type folly you see in some is where wifelys Great Grandma was born, her family once owned the big house and surrounding parkland.
Roll 2 – Sunday morning, one roll to shoot! I packed the tripod and set off to Plymbridge woods, the River Plym runs through its deep valley lined with pine plantation with lots of abandoned quarry workings, railways, cottages etc. I started with a few simple shots to warm up then taking the advice of a wise man I tried some adventurous long exposures in the very shaded valley bottom, the longest up in the 20 seconds with a deep orange filter. These were using bulb mode, I much prefer these slow cameras when they have better low end shutter speeds, 1 1/15 just doesnt cut it for my preferences. I climbed the steep bank and finished the roll walking back on the old rail route. It went I think very well with a couple of exposures straying a bit, some of the results are a shade dark but then it was dark so a fair representation of conditions.
Thoughts – It wasnt nearly as bad as I thought it would be, I am really pleased with the results too. If I saw one in a flea market in the tens of pounds I might be tempted or NOT! I will not make comment on the new prices… A good medium format starter camera if you like plastic.
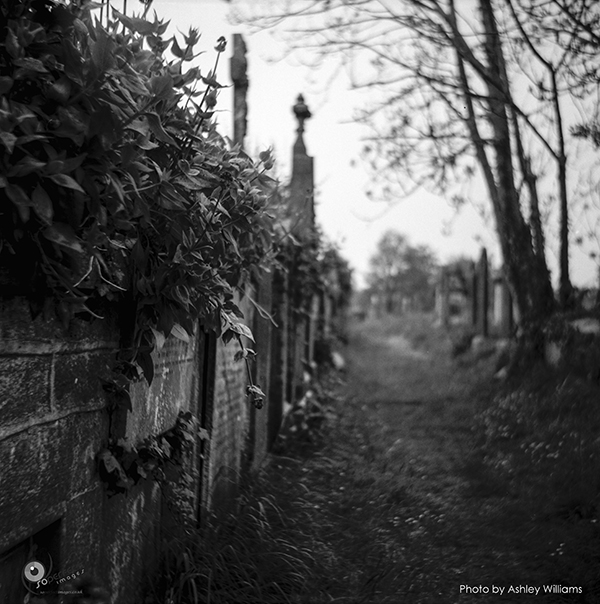
Week 26. Wow the half way mark. To celebrate the occasion and to give me an antidote to last weeks pressure pot i have been entrusted with a cardboard box. The Coronet No2. What do you get? A cardboard box with a lid on the front held with two clips, not opposite each other but on the left side on top. Two bright prism finders on the same side for landscape and portrait. On the top is a handle and a pull out bar for timed shutter. Back to the left side and there is a knob and taking switch. On the front is a hole containing a Meniscus lens with a single f14 aperture a simple shutter of 1/25th only, below it is a switch to swing the 3 foot only focus portrait lens into place. Other than the 120 spool holder and a little red window in the back to count your 8, 6x9 frames that is your lot.
Roll 1 Ilford FP4. I loaded straight away. I had no expectations other than probable light leaks and unbalanced exposures, the f14, 1/25th were approximates with little info on the web. I cobbled a set of filter glass and a holder, yellow, orange, strong orange, green, and a hood held on with rubber bands. I was not looking to create any particular look with the filters, that would be a bonus, they were there to give stops shifting the aperture tighter and i planned to multiple exposure as well for the too dark situations. Using the spot meter, i metered as normal and went with an aperture matching up with 1/25th, then use the filters to pull it back to f14. I wandered the usual haunts of the Barbican where the tall ship trainer was in dock and slowly worked the exposures. For some idea as to what i used, the shot of the men working on the ship was a straight f14, 1/25th while the Lido pool and fountain was a strong orange x2 exposure. The marker stone a straight x3 exposure. I saved one frame and attempted long exposure portrait of a determined five seconds that would have been good except i forgot the portrait lens and got nowhere near allowing the parallax error. Other then that and the obvious mismatch of hood i was really pleased.
Roll 2, another FP4. I changed the hood and lost the filter holder just sliding the glass in behind. I did pretty much the same as the first roll but with some good cloud cover i tried a more adventurous approach attempting to utilise the filters to their best, double exposing with the orange on the ship, green on the cafe. I repeated my portrait attempt remembering the close up lens and measuring the required three feet, much better.Still a bit of parallax correction wise but closer. BTW, if you are wondering why the girls are looking off into the distance it is because they kept getting the giggles. Not great for a three to five second exposure. 30 minutes for those two frames, lol. A few light leaks crept in with a bit of fogging on a few, the lid just is not tight enough and being paper covered cardboard, tape was not an option, so i can live with the otherwise pleasing results.
Did i like it? Damn, yes, capital YES. It is simple and basic yet with a little thought you can get creative and push some boundaries. The lens is reasonable the middle getting much softer as you get to the edge giving a tilt shift effect. I was glad of the slowness too, something that is increasingly where i want to be. If it were mine i would strip of f the felt around the inner lid to easily fix that leak. I would also concentrate more on central points of interest to ultilise the centre sharpness that is wasted on attempted landscapes. I had lots of fun, i really did.

Week 25 – R.B. Graflex series b
Week 25 – Kodak 2a Hawkette
WEEK TWENTY FIVE!!! –Zeiss Ikon Super Ikonta!
Yes, yes! You get the drift! Please read on. For some time, well almost since the beginning,
Russell has been trying to get me to shoot the horrible Kodak as he thinks it
is great. I however do not. Then 2 weeks ago he bought in a Graflex and it
really caught my eye so after some pestering we shook hands on a deal – I would
shoot the Graflex for week 25 on the understanding I would have to shoot the
Kodak thing for 26!
I took the large box home, I will not go into any detail as
it will become clear as we go on but I read, studied and learned, liaised with
Erik Gould who has expertise in the camera and went for a dry run … nothing!
Fiddled twiddled and finally took the back plate off, the cloth shutter had
broken! I was gutted! 3am I finally gave up any hope of rescue. I awoke in the
morning and trudged to Russells to pass on the bad news. Now whether it was
the fuzzy head from lack of sleep I don't know but in that 30 minute walk I
decided I would not quit, I would not be beaten and formulated a plan to run a
rebuild as a side project where if successful I would shoot it on week 52. You
will find this on Soperfect images home page where this is… the bad news was I
now HAD to shoot the Kodak L
I got to Russells and explained, he sniggered and dragged
the glossy fake wood looking plastic monstrosity from the shelf. We were already
on Wednesday and not a frame shot so I immediately loaded one of the expired
Delta 100s and set off …STOP! [Cuts to chase]
when I developed the roll every frame was black on the negs so positive
white, in my hurry and drowsy state I made the school boy error of not checking
it over properly, the bellows were shot and leaking light like colander.
We are now at Thursday and no camera and no pictures, I am
drained and very miffed! Back to the shop where a line of Zeiss folders had
just come in, Russell passed me the pick of the bunch, I took it home, checked
it and loaded it with expired Portra 160vc colour.
The Zeiss Ikon Super Ikonta – I have done a couple of Zeiss
folders now but this is more advanced. Tessar lens – light meter that gives you
your combinations, 120 type 6x6 frames that auto stop when advanced etc. Google
it if you want the jargon but it looks and feels quality – its been a LONG
week! I shot the Porta using the camera meter rapidly around the harbour trying
to see things in colour and got it in the developer asap. I scanned it in the
early morning, they were ok with some colour shift but the heavy beast had done
ok. All the knobs and twiddly bits were in good positions where you could work
with comfort and not have to be searching too much for things. The centre spot
in the viewer for the rangefinder was small but bright and clear. The next
shoot day was Sunday, today! I loaded one of the expired Delta 100s that have
done well before and set off early with the tribe as my 2 youngest were part of
the junior half marathon. We were only there three hours but I tried my hand at
some sports photography – man that is hard, especially with a bulky
rangefinder. I have just looked at the scans and to be honest they suck, the
film either rubbed on a stiff roller or this one film is just not at its best.
My panning of moving targets while trying to be in focus was rubbish really
while my hurried exposer settings were riddled with errors…speed is not my
forte! Over all, the camera is good and does everything it should but just
isn't my bag, the extra size and weight with the meter system makes it clumsy
for what is reported to have 35mm qualities. The focus wheel and
shutter/aperture rings are too easily accidently moved if you aren't careful. I
wish to draw a thick line under this week, get some rest and smash next week…
Please do look in on the Graflex, it should be interesting.
Week 24 – The Voigtlander Bessamatic
Well I don't know where to start! A bit of a funny week that really kept
me on my toes. I will try to keep it short but it won't be easy. I arrived at
Russells to see what was in store and he pulled out this little package – A
Voightlander Bessamatic c1959, a 35mm SLR with a F2.8 colour Skopar X 50mm lens
attached. With it also - a Skoperex f3.5 35mm wide, a Super-dynarex f4 135mm
prime, a set of Voigtlander filters and a hood – a great kit! At 2lbs in weight
it is heavy and built like a tank, but a tank with finesse! Really superb build
quality all round. I would advise looking at many review sites as the
complicated mechanical workings that make this one of the most enjoyable
cameras I have used would take far too long to go into here but quickly - You
have to advance and cock shutter to view through the big bright viewer, you
focus via a fairly standard split prism. First dial in using shutter ring on
the front a desired speed, then on the right side of viewer are 2 needles >
turn large knob top left until they align. The interlocked shutter aperture
mechanism has now given you a pair of suitable settings that by turning the
shutter ring can be changed for any preference retaining the same EV value!
Pretty cool eh! Thats not all, at the same time two further pointers on the
lenses open or close synced with it showing the D of F your settings will give
you! You want to use an external meter? Easy, just set the shutter speed FIRST
then turn the meter knob until the aperture you want lines up…easy as, it
really is.
Roll 1 – I fancied some fun so went for a slide colour film, an expired
Provia 100f that I would cross process as c41. It is a straight forward load –
I decided to run this one on the cameras meter then go spot meter on the second
roll. I had to hump the block of iron in my hand as there was nowhere to attach
a strap and no case, I think Russell will be getting one. It really was simple
and enjoyable to use, the advance lever in the standard top right corner purrs
on the out and in stroke, you find yourself deliberately doing it slowly just
to listen. When it comes time to press the shutter button there is a lovely
metallic swish that is gorgeous. If you recorded it and played it backwards I
swear it must whisper “buy me”! I quickly ripped through the roll and had it in
fresh developer ASAP. I looked at the negs and was worried – looked at scans
and was horrified! They were massively over exposed, I checked the meter
against many of my own and it was fine, I did every possible check to camera
and it seemed sweet. There must have been a reaction during processing which
can happen. I have included some images – some untouched so you can see, others
heavily adjusted or BW conversions just to have something – My apologies!
Roll 2 – I decided to run a second, FP4 B&W. I mixed up the metering
with on and off camera, I wedged it into half a case and went about it all over
again. Having a strap is even better, you just look down and everything is
there for you the see and adjust. I had a great afternoon shooting, it begs you
to use it. Back to process and a massive
relief all was good, very good I thought.
I loved this camera, it is super easy to use whichever way you meter, you lose some shadow detail with the on-board but it is good enough. It sounds and feels superb like a fine time piece. Lenses switch out easily and are very sharp. Ah, I forgot the filters. There is a nifty scale by the meter knob matched to their values, and you simply turn the meter knob and line up the markers to the clearly marked values. ANYONE could use this fully manual camera and get good results while experienced folk can delve as deep as they want. The one down side is all those trick mechanisms will be costly to repair and service. If you ever see one on a shelf and pick it up, I doubt you will want to put it down. I made a bold claim to Russell – I would trade ALL my 35mm cameras for this one and I stand by it. Hope you enjoy the FP4s and the Provia gives you a giggle.

Week 23 – The Mamiya 645.
TMax Party week, a week of fair weather and the kiddie winkies on hols
meant a chance for some photographic fun. The Mamiya is another one of those
cubed multiple attachment medium format SLRs, in fact go back a month and read the
Bronica week there is little to say different! The 2 main differences were for
this one there isn't the option of interchangeable backs and the mirror recoil
is much gentler. I went all tripod and slide in square filters so I could play
a bit and get the beasty down in the slower shutter speeds.
Film 1 – Ilfords SFX 200, a black and white film mimicking infra-red
film but my twitter buddy Sandeep informed me could be shot like regular
B&W film. It was a nice sunny day with the right sort of clouds. I wandered
the harbours dropping in yellow, orange and eagerly popping in the red filter
to darken those blue skies. There was my first school boy error! If you look at
the ice cream van shots the writing has all but disappeared, I had been so
focused on the background I missed how it would treat the central character!
That said the results are very good over all, a film for first time out I
thought I did well with and it has a feel and glow I really liked. Then we get
to our second film…
Film 2 – Kodak TMax 400. A film I have struggled with, I just cannot get
to grips with this finicky film. The 3 days it took to shoot it ranged from
even overcast grey to super bright harsh clear skies so developing for all
image metering was difficult. I tried stacking filters for effect, a couple
have graduated ND filters behind orange and that didn't really work giving a
look like I used a lightroom filter badly! I tried 2 shallow D of F of my kids,
one close and one far with the latter not really working for me. I am just not
a great fan of this film type and the images just miss something for me
although these are probably my better efforts.
The camera itself was nice to use, simple, straight forward and sharp. I
cannot see myself going down this route though, I prefer my 6x6 TLRs. If
interchangeable lens/viewer options are important to you this modular type
system might be for you if you don't mind heavy! Which of the several available
makes would be down to aesthetic taste?
Week 22!
The Univex Mercury 2
Several weeks ago I was passed this camera more as an oddity for
Russell's shop. I think he saw it as more of an ornament, a dressing piece if
you like. He liked its quirky look! I gave it the once over and all seemed fine
except for a lot of fungus on the lens, when I say a lot I really do mean a
LOT! He sent the lens off with a batch of cameras for repair just to see if it
might be improved.
So, while its off being cleaned – the camera. Short version! Universal
Camera Corps were better known for cheap plastic toy cameras but in 1938
produced the Mercury to compete with higher end cameras. Work moved to the war
effort, then in 1945 they returned to cameras with a revamp – The Mercury 2! A
half frame viewfinder with a magnesium/aluminium body machined to ridiculous
standards, I have never seen a film door fit that flush! It has an odd semi-circular
protrusion on top to house the innovative rotary shutter, a black fake hide
cover wraps around the main body. The viewer is in portrait mode and while the
eye piece is tiny it is clear and bright. As you look at it front on the left
knob is the advance and the right one is the shutter speed. The screw on lens
is a coated Tricor 35mm f2.7, between that and the body is the distance focus
ring with many bold increments assigned. It takes 35mm film which gives you 46
frames from a 24 and 70 from a standard 36…ah, the lens is back!
The lens was better but still heavily marked so I thought just one film.
I easily loaded an FP4 and set off on a long city wander with an aim to push
every angle, close up and depth of field option while capturing a bit of normal
Plymouth that usually just gets passed by. I had to go without a strap as that
is on the case that I did not have. I carried a light meter, my trusty
universal clip on yellow filter/hood combo and a note book. With so many frames
I was fairly loose with metering notes concentrating more on getting the camera
set in the right order. You have to advance the film BEFORE setting shutter
speed! I also deemed the fast F2.7 and the heady 1000th of second
top end shutter speed combined with lots of distance markers a sign I would
need to be pretty close with my focusing guesses! All went well I thought, I
had a few miss-fires, forgot to put the filter on a few times etc. Then I got
to 46, it kept going – 52! – I got concerned – 56! I gave up! I had all sorts of possible disasters in my
head, film snapped, incorrect load – had I shot 56 nothings?
Results – straight home and in the tank! 30 minutes of torture, out they
came! Lots of tiny cute images but just 45 and a half, the last one had clearly
got lots of exposures overlapping so, it takes 46 and doesn't tell you the roll
is finished. Once scanned it was clear the lens fungus had softened the images
but not too badly really, they have a real era feel about them. It had caused
flare though where brighter light was present which is a pain meaning I pushed
the blacks and pulled the highlights in post mainly and I presume the smaller
images make them a little grainier. If you spot the two pictures of the
magnolia flower one was taken centre frame the other using the parallax
correction markers in the viewer from 18inches and they work. I tried my
hardest to make shallow D of F images but it just wouldn't!
My conclusion – it is a beautifully made funky camera that was immense
fun to shoot, the lens is an issue if you want sharp and they are as rare as hens
teeth to find. It is a fun collectors piece that is totally useable if you can
live with the lens.
Week 21 – The Pontiac, Paris, Bloc Metal 41
For several weeks now Russell has hinted he wanted me to take out the
Pontiac. If I'm honest it didn't thrill me! I don't know why as I like my
folders, in particular 6x9 format. This eats standard 120 so pretty straight
forward. It looks a lot like the Agfa Billy Record with its hints to Art Deco
just not as well finished or built in my opinion but then the Agfa is German! The Pontiac is French built
c1941, cast alloy body painted black with some chrome trim. A little brilliant
finder quite difficult to see through sits to one side and on top of the home
grown f4.5 Anastigmat lens housing their own shutter marked T P 25 50 100 150
and a distance finder ring perched on the front.
I choose to load it with an Ilford Delta 100 which although a little
expired would rate easily at box speed. I had acquired 8 of them and the 2 i had used had behaved well. Loading was a small hassle and I had to do it 3
times as the markers were really hard to see through the red frame counter
window. Once I had it I shot the first roll pretty quick along with a little
box brownie I had repaired and was testing. The weather was ok with sporadic
heavy showers that broke into short spells of blue skies with dramatic clouds.
Results – I developed quite gently safe in the knowledge I had been very
careful re the exposure so I was hoping for some nice negatives. Ah but no,
they were really thick with clear evidence of light leaks. I popped down into
the cellar and candle tested it and sadly light was visible through the shutter
which I can do nothing about with the usual electrical tape so the decision to
stop there I think is prudent, no point wasting film.
I have adjusted the blacks and lowered exposure levels in lightroom for
presentation, it isn't the sharpest lens either but it is ok, there is also a
lot of dirt in the bellows. There isn't much else I can say other than I hope
someone out their will love it. I didn't, but that is a personal taste thing as
I am holding it up to the Billy Record which impressed me.
Week 20 – The Pearlette 1929/31
Week 20 eh! Time flies, this is a week with a difference
too, I would be shooting everything in one day – Wednesday brought Expired Film
Day! This is a day when many photographers around the world load film well past
its sell by date to see what comes out of the other end, dust, scratches,
colour shifts and grain are all encouraged and embraced as character!
I was to run 2 cameras. My own beauty, a 1936 Zeiss Ikoflex
TLR and the Pearlette. I selected 3 films – a 35mm 1998 Truprint cheapo colour
and a 2005 Ilford Delta 100 in 120 for the Pearlette with an OWRO 27n 1991 120
for little Ike.
The Pearlette – a vest pocket folder taking 127 film, it is
so similar to the Kodak VP we shot in week something or other you can pretty much
go with that. This second generation model from 1929-31 made by Konishirku in
Japan, they later became Konica, has the better option lens, a Delta f6.8, a
fold out frame doubling as a sports viewer with inset close up glass and
clearer italics on a full length face plate which acts as a stand, this is all
that really differs from the Kodak.
The film – We are back on the 127 trail, in the early hours
of Wednesday morning I rolled a length of the very stiff and curly Truprint
35mm into a 127 backing paper. The OWRO was 120 so ready to pop straight into
Ike as soon as I had finished the roll in her. I used the new improved jig to
cut down the Delta with the cigar cutter and that went perfectly so we were
ready to go. A quick clean and check of gear with no tape or bellows test on
the Pearlette so what came out was what we got!
Shoot day – I would be shooting between work walks, Cash and
Carry runs and any other time I got a chance. The weather was dry but grey and
dreary. I had my light meter, a cable release and a tiny tripod designed for
little digi cams. I cleared Ike of her resident film and loaded the 400 OWRO
which I rated at 200 asa, the 35mm 200 colour sprockets went in the Pearlette which
I rated at 50. This I rattled through fairly quickly and soon had the Delta 100
in which I ran at box speed. Things I thought were going well, having forgot my
specs I found the cheap loupe I carry ideal for looking into the tiny prism
viewer of the VP. Things slowed as ideas and energy waned. I got a couple of
shots on a stop at Ham Woods of which we will pick up later. I had work that
evening and was left with a single frame in each. These I shot playfully just
before midnight taking long exposures of each camera still life style. Using
the Ikoflex at f22 for 2mins 30 secs and the Pearlette at f32 for 15mins 17sec!!!
Done!
Results – Not having the benefit I usually have of studying
the last roll to make adjustments I wasn't surprised to see similar results. OK
they aren't great! It took me a while to suss out why there was huge vignetting
and varying focus issues with the Pearlette, it finally dawned the bellows were
not fully extending meaning it didn't have the correct focal length, they were
a bit stiff! No light leaks though which is good. There was a little film creep
from the 35mm but thats the film being stiff and curly. I managed to shoot 7
shots of the OWRO roll on the leader so just 5 shots I will include just to
keep my expired day in one place.
Conclusion – great day! Some fun images. The extension issue
sorted with a lube! Now, 1 shot made it all worthwhile, the stream shot in the
woods – f8 with 5second exposure… take a look! YES this camera CAN take good
pics it just needs TLC
I hope you enjoy the images, they were never intended to be
held up to perfection but I had hoped for a little better….but that ONE!
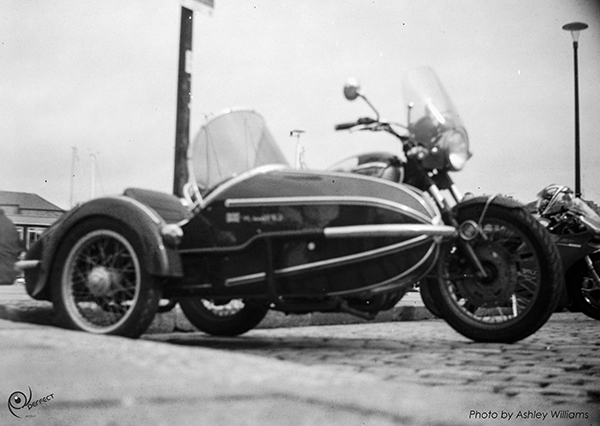
Week 19. Zenza Bronica
A week of such promise and excitement, I have doubled up a few previous
weeks with the social media fun of FP4party, this has now transformed into TMaxparty
so a move from Ilford to Kodak. I have shot a couple of their 400asa with mixed
results but optimism and the sight of the Bronica gave me renewed hope. The
Bronie – medium format big SLR system, basically a central body with a huge
array of options surrounding it with a few of those open to me for this week. The
camera checked, I loaded the detachable 120 back with TMAX 400. 220/35mm/Polaroid
are also available. I had the one lens but there are others as with any SLR but
this one was an F2.8 75mm Zenzanon EII. I chose to fit a speed grip with
advance lever and shutter release which would gave me a more traditional SLR setup
coupled with the prism finder!
Roll 1 – Monday arrived and just awful weather! Nothing doing… Tuesday
repeat… ditto Wednesday! Its worth noting I also have a 35mm TMAX 100 loaded
in my Pentax to run at the same time so pressure to shoot was mounting.
Thursday was as dull as dishwater but dry so I set about trying to shoot things
without sky but still having something interesting in it, a yellow and orange
filter on hand to squeeze anything out of the grey skies. I plucked up courage
to request a few portraits from strangers and we got through the roll. I was
spot metering as there is no on board meter and the aperture ring of f2.8 to 22
and shutter knob - 8sec to 1/500th are all full manual which is
beautifully simple. When you trigger that shutter the mirror retracts with a
sound striking fear into small children and attracting the attention of all
around not already admiring its behemoth good looks. Fear not though I
successfully hand held at 1/60th with ease!
Roll 2 – Sticking with the Kodak theme I loaded a Portra 160nc, a little
out of date from 2012 but should be like new. I switched to the little crank
advance arm and moved to a familiar waist level viewer. The frame sizes of
4.5x6cms with this set up would and did prove much harder to use in portrait.
Friday/Saturday were just impossible with weather and work but a productive
Sunday saw the roll off easily shooting on and around Plymouth Hoe and Barbican
with a Polarizer to help. I tried playing with depth of field, angles comfort
zones etc. to test myself and the camera.
Thoughts? Loved it! BWs I got good exposures and the set up while heavy
gave me lots of options. I felt good carrying it around and heaving its mass up
to my eye gave me a feeling of gravitas. The Portra pics are coming through the
scanner right now and look pretty good but for a bit of glare here and there as
I used a hood far to short really – lesson learned!
The best way I can put this is if wifey told me I had to get rid of all
my cameras and have just one then the Bronica would be a serious contender, but
I would need both viewing options. With the flexibility of multiple film backs
for 120/35mm and swapping out mixed emulsions as and when needed I could
overlook the weight and limited 1/500th max shutter speed…a lovely,
lovely camera but somewhat out of my budget!
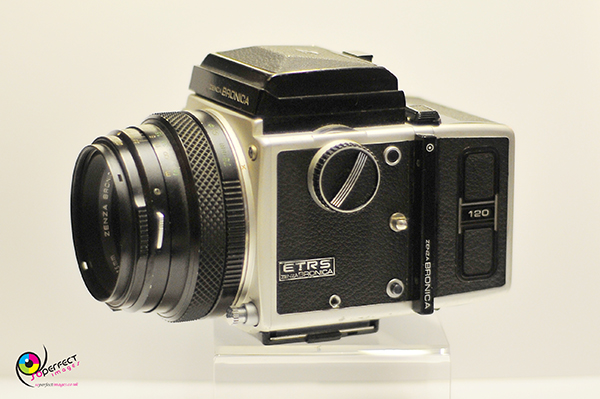
Week 18 - The Yashica Electro 35 GSN
After looking back at a few recent ramblings, and I am happy to ramble
but admit they were a tad lengthy so I will try to pare it down a bit. So this
little Yashi Electro is mine, we had intended to run together with one of
Russells but it didn't pan out. I got her from a friend through work who said
it had sat in a shoe box for some time. It needed a now unavailable mercury
battery so a converter and suitable replacement was ordered and received for
£7. I set about checking and cleaning using the plethora of sites dedicated to
the mass produced well thought of beasty. You can find all the techy stuff
there so I will only sneak bits in where necessary but YASHICA GUY is the first
think to look up as he really knows his stuff I used his check list and
determined all was good.
A quick glance at the weather predicted for the week coupled with work
left me 2 mornings Tue/Wed and all day Thursday then it got nasty! They called
it right too. I decided run a couple of 400 speed films to give flexibility
with changing light controlling the extremes with filters and fiddling with the
film speed dial, as aperture priority you adjust exposure turning the aperture
ring between f1.7 and 22 – a nice bright lens of 45mm! The meter then sets a
speed showing a red arrow in the viewer for over and a yellow for too slow to
hand hold.
The two mornings I wandered around the city and seafront loaded with
Ilford HP5 snapping away trying different things using a yellow and orange
filter often in the rain adjusting for filters using the film speed wheel. I
tried to keep it just touching the red arrow having read it tends to over
expose, planning to pull development 10% to hold the highlight. I struggled to
be honest, the focusing was a synch with big bright finder and clear focus spot
but I kept forgetting to change the film speed and fumbled with the aperture
ring meaning I got it wrong! Under exposed and under developed! I have done
some tweaking to present better and it is all on ME!
Thursday was lovely so loading a nice Fuji Superia Xtra 400 I set off on
a quick ferry ride and walk along the river Tamar shoreline and explored an old
boat yard. I attached a polariser guessing where the optimum setting was which
is not easy on a rangefinder! I had a great few hours trying shots I wouldn't
normally really, getting to grips with her and things went far better. I set
film speed to 160 asa and left it there which, with the bright skies and filter
and trusting the meter gave great results.
Summing up I had a lot of fun. The lens is sharp enough, meters well and
if you stay within its limitations you can get a good set of pictures. She will
definitely be coming out again probably with colour film on those snappy happy
type days.

Week 17
Kodak No 3 Folding Pocket Kodak [model E-3]
Finally! I get to play with this!!! So, for many, many weeks I have
looked at and admired this camera. It sits with a few other No3s on a shelf but
this one really had me drooling over it. It is a big medium format folding
camera producing postcard size images on now defunct 118 film with 3 1/4 x 5 ½”
frames made by Kodak and built between 1903 & 1915. I can with some
certainty date this one between Nov 6th 1906 & May 7th
1907. How? 1906 date last patent stamp inside back and the marked as “patents
pending automatic” the shutter it is fitted with received its patent on the
1907 date! Good stuff eh! The postcard size images give away its target use –
BIG scenes! This backed up by the provided settings – the shutter mentioned
fires a 100th, 25th, 5th half, quarter, 1 second & T+B. Aperture in old American guise
4-8-16-32-64-128 which in todays money is f8-11-16-22-32-44! The beautiful red
bellows pull out on two rails with possible pre-set distance finder stops at
3-5-8-30metres. This was an early expensive version carrying a Bausch &
Lomb rapid rectilinear lens with up/down left/right adjustment to front unit. A
waist level prism finder is how you view your scene, better than a lot but
still meh!
Due to the obsolete film, a set of spindle extensions from @camerahack
FAK118s allows use of 120 film. This means you can no longer use the film
counter window so I repeatedly loaded backing paper marking and counting half
turns, the quarterly placed screws around the advance key make this really
simple. I placed the big arrow line at first roller, then 15 half turns nail
the first frame then I went 6,5,5,5,5. Should have given me 6 frames.
Roll 1 FP4 and a trip to the moors specifically Gutter Tor and the old
abandoned Ditsworthy House, a long abandoned farm stead that has been used for
military training during and since WW2 and later filming of War Horse. It
wasn't a spectacular day, a bit dull but a bit in the sky. I went about setting
up tripod shots of half second exposures at f32/44 ish at the longest focal
length to see just what it could do landscape wise. I did have to use it fully
opened at all times as when folded I determined it was going to hit the film. I
suspect being left open for a very long time has allowed the wooden ribs in the
bellows to warp. All went really well, slow and calm which was most enjoyable
though the film could be heard dropping off the roller early so just 5 frames.
Results were pleasing! Well exposed so all was working sweetly and no sign of
light leaks at all. The lens was sharp enough at the given 30m distance but
lost a lot at infinity which is common for these folders. What it did have was
a bucket load of character!
Roll 2 FP4 – After 2/3 days of poor weather and Storm Doris approaching,
I was left with Thursday morning at the Royal William Yard determined to try
other types of shot on a tripod in already 50mph winds. Shot 1 I warmed up with
a sea scape of longer exposure than I expected and the wind gave it a tug,
frames 2/3 the cranes again I was struggling for light! It was at this point I
noticed I had the meter set at 50asa…. I chastised myself but carried on, I
shot at all the distances with good sharp results. I allowed for reduced ASA during
development and they came out well again, I even got the 6th frame
by taking a quarter turn off each advance.
I guess some might not like the 6x10.5cm resulting frame size, or the
faff of counting turns or having it open all the time. I, however am very happy
to live with its quirky really slow nature. Rubber band attached hoods with
fettled filters, pockets full of notes etc. It is a 110 year old camera that
still can put a sharp light tight image filled with character on to film. You don't have to worry however as I will be
returning this with my name written all over it. I want this beautiful piece of
history although wifely upon proof reading this might not be so keen! Further
text is not of my doing >>> Dreaming!

Week 16 - Nikon N800s
This week is a tad different in that we combined two projects. I had
been approached last November-ish about contributing some pictures for the local
Dartmoor Zoo, a small zoo which carries a little fame as the film ‘We Bought a
Zoo' tells the owners story, but the timing was bad and I passed. Two weeks ago
Coral asked again and I agreed.
The main bulk was to be digital but we agreed I would take some film
stuff too. The plan was to use Russells favourite Nikon D300s and combine it
with a film body but only use lenses that fitted both. The 8008 was ideal! Yes it
is all electric, but the auto focus and TTL would be needed as I was getting
access to places where speed might mean I would not become lunch! I picked up
the camera on the Tuesday and shoot day was Thursday so I threw in an FP4 test
roll and blasted through it on the way home. The weather was changeable to say
the least! Everything bar snow! I tried everything to find its limitations and
upon viewing the results it had performed admirably. I set about reading the
instruction manual and abandoned it straight away so I won't rattle on with
techy stuff as it was like War and Peace but I will say it is weighty yet well
balanced with lots of features to please everyone. You can go all auto or
choose shutter/aperture priority with ease. It was, in its day back in the late
eighties, aimed at serious amateurs and had a reputation as a bullet proof
reliable excellent camera.
Lenses we took were prime 50 & 85mm, 35-80, 18-70 and a 70-300 all
Nikkor with a stonking 150-500 sigma with its 2x converter for those places no
man should go. I shot Fuji Superia X-tra 400 and Kodak colour 400.
Shoot day arrived and we were escorted around by the lovely Coral. I
started by shooting both but had a devious hope that Russell would get the itch
and take over the D300. Russ hadn't done a shoot for exactly a year since his
illness and as I hoped my fumbling with the myriad of buttons must have driven
him potty and he eagerly ended up with it leaving me to play with the 8008.
We
chopped and changed lenses between us and the day went really well. I soon
realised I wasn't going to get everything in one day, animals are finicky
things wanting to either sleep or stand in the wrong place! But we got enough
to start and I found the 8008 a really nice beastie to use. The little dial on
the top by my thumb easily rolled through the shutter stops displaying clearly
in the large bright viewfinder, all be lenses focussed fast and precisely with
only the sigma requiring manual focus. I can also confirm hand holding 1000mm
of zoom at 1/15th doesn't work.
Now
I could write pages about the day and the camera but I think the photos sum it
up. I had one roll of film prep and dove straight in. I loved it! I am normally an all manual slow photographer
so this was really far from my comfort zone and it never missed a beat with only
user error spoiling shots. Enjoy the pics, we have pruned them down as there
are many. Hopefully Russell will put in a few of the digital shots he took
recording the day….. A great experience all around.
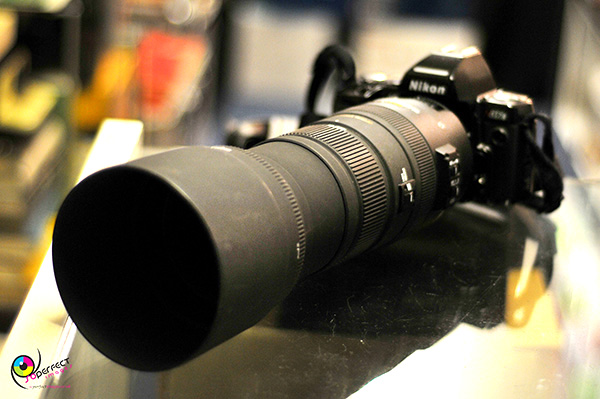
Week 15 – The Meopta Milona
If you just read the name and thought “the what?” well I thought the
same! With the previous weeks awful weather continuing into the new week it was
Tuesday lunch before I got to the shop itching to shoot something! Russell was
busy with some students so I settled at the back fiddling with the expected to
be ornament pieces, I picked up the somewhat tired looking Milona and ran
through the shutter and twiddly bits and it seemed ok, I was intrigued by it.
Pretty basic stuff. A 120 6x6 MF with a regular Prontor 2 shutter maxing at
1/250th, aperture f4.5 – 22. A fairly standard distance finder dial
surrounds an 80mm Mirar, Moepta's own lens on a square panel face. It is a
folder which is released by a button on the top plate coming out horizontally
on a short bellows, sighting is done through a fold up square sports finder
with glass in it. Apart from the big round advance knob and a frame counter
window with a rather nifty spring loaded masking plate that is your lot! There
is very little written about this camera but searches found it to be Czech made
between 1945/50, later the shutter was pushed to 1/500th and a tilt
on the front plate to correct parallax error along with the ability to take 4.5
x 6 as an option. Meopta made a handful of TLR's, weird 35mm cameras but were
predominantly optic manufacturers. Anyway enough boring stuff …
Roll 1, Russell had to hand an expired Lomograph colour 100 which loaded
there and then, I needed to get out and play! A series of conversations had
sparked an idea so this was the perfect time. Most distance finders have a
“snapshot” setting and the Milona's was f10 – 15metres and 1/100th
on the shutter for the 100 asa film, yes, I know I should stop down but meh! I
gave myself an hour to shoot the 12 frames on the way home snapping away at
things that mean nothing really but at the time... This would be how a person who
had picked up an inexpensive unit from a fleamarket or similar with little or
no experience might shoot. I did for testing purposed try 1 or 2 shallow depth
of field etc but the exposure
calculations came out approximately the same. The results were OK, yes there
was some colour weirdness due to the films expired nature and oddly the colour
in bright highlights appeared bleached, the mural being a good example looking
fine in the shadows but given a fresh film they would have been in the ball
park, what surprised me was the lens seemed pretty sharp.
Roll 2 – My favourite FP4+ and fresh! This time I took it to where I
thought the above mentioned might take the next step, a £3 hand held Leningrad
light meter which I just aimed into darker parts of my frame, I roughly guessed
distance and experimented with settings and a couple of filters while out with
my 2 youngest. I was fairly casual about it just enjoying the time. I developed
it on standard times with some stock solution that needed using. The results
were great I think for what we did, I didn't do well with the red filter shot
and there were some parallax errors in there but I did squeeze some shallow DoF
and most exposed well with minimal loss in the highlights. What a lens though!
Pleasingly sharp with enough character to please the eye.
To sum up this was at first impressions a slightly tatty old folder from
a left field maker with a price tag down the bottom end but performed beyond my
expectations, light tight with no tape needed, sharp enough to please most and
easy to use for the beginner with enough in it to satisfy the keenest vintage
user. I got enough good pictures using a casual approach that I think if you
put the effort in it could give much more. I am glad I rummaged through that
shelf I used a camera I might never see or use again as there isn't many out
there it seems.
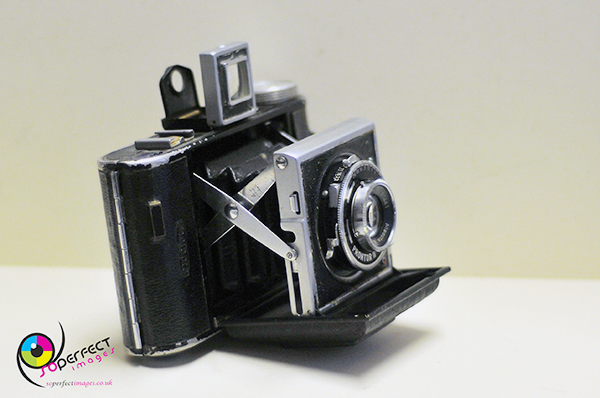
Week 14
AGFA BILLY RECORD 8.8
The Billy Record! A 120 folder, I am really starting to enjoy
folders even with all the possible problems they may bring. This little fella
has an all black body with nice chrome deco trim, produced between 1933 &
1949. This one is post 1939 or the trim would have been nickel. I think it was
most probably aimed at your average family as a grown up camera, kind of like
todays budget end bridging cameras. Some shutter settings b – 25 – 50 – 100th,
aperture 8.8 – 11 – 16 with guesses in between. Focusing has just 2 setting
2-5m & 5m to infinity, and that is your lot other than a crappy tiny glass
prism you can see your own face in and flip up sports finder. A simple uncoated
Anastigmat Igestar 105mm lens puts your image into 6x9 frame.
I got it home and gave it the usual check over and clean,
the front lens screws off so you can give most surfaces a good clean. I popped
my test light in and the bellows were good to go. I had to glue down the bottom
plate with a spot of gorilla glue but other than that it was in great
condition.
I loaded up an Ilford HP5 which was one of the nicest loads
I have ever had to do and ran a single line of black tape around the door more
for peace of mind. I think it is pretty light tight, I just do this with
folders anyway! Sunday morning brought light drizzle and mist but I decided to
head for the moors anyway. It got worse on the drive so I detoured to Shaugh Prior
to shoot at the river. It was dull, really dull and I was struggling for any
light so I risked some long exposures using calculated guesses and counting out
loud. By frame 4 everything was soaked, it was getting worse so I beat a
retreat. It rained then non-stop until Wednesday! A crack appeared in the
weather and I was able to get off the last 4 frames on my workly wanders. The
“head” is carved from a tree stump in central park and the Arches are actually
a city historical reservoir retaining wall, double exposure, note the ghostly figures.
I finally got to develop it on Thursday, scan Friday and was pleasantly
surprised! Sharper than I had expected with good exposures.
Loading roll 2 a Kodak TMax 400 I missed the first frame. Into
the bag and reload. Sunday morning back onto the moors – bloody freezing! Wind
chill factor high so numb fingers and again not great light. I shot all 8
driving from spot to spot all at 1/25th covering the f stops. There
is such depth of field it makes little difference but beyond 20 meters
sharpness slowly degrades and I think f11 is it's sweet spot which makes sense with
its box camera mentality. Results were OK. My first time with this stock and
never really got on top of the exposure/development combo.
In short, this was a fun camera to shoot and gave
surprisingly good results that I think would do really well on a sunny day. You
could fire away using sunny 16 and get great pics. I pushed its limited
boundaries and it stepped up admirably. Just a shame I only got 3 short
mornings with it.
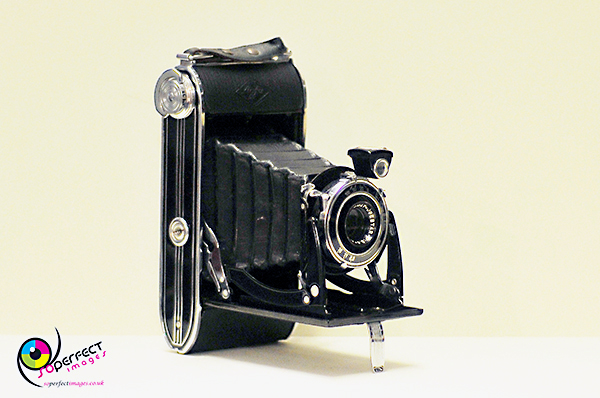
Week 13!
The Zeiss Ikon Contaflex 1
Week 13 already!!! Its flying
by! This week, after a few weeks of butchering perfectly good film, I was glad
to have something more main stream like the Contaflex. One of the first 35mm
SLRs to come on to the market the “1” was released in 1953 until 1958 and this
is early as soon after release they changed the aperture scale and this has the
early version. Its a nice looking
camera with some quirky features I will go into as we go. First job was to get
it home and study. I went for the load which is slightly different in that the
take up spool is the same as you will find in any 35mm cassette and WILL just
fall out as you drop the back off as I found out! I am sure many have been lost
but this has its original which is nice. If you are a bulk loader then you can
actually just feed into an inverted empty cassette which is kind of cool.
I loaded up the first film, an FP4+ 24 exposure and set about giving it
my best over 2 mornings trips to and from work. I tried to cover as much of the
range of speeds, B to 500, and aperture, f2.8 to 22, as I could and the weather
was favourable. Quirk number 2 is – to see through the huge and bright
viewfinder you have to prime the mirror by advancing the winder and cocking the
shutter or all you see is black… I like to use the viewer when deciding a shot
so a bit of a pain. It also advances counter intuitively but you get used to
that. They say it is easy to maintain having one weakness being a sticky
aperture iris positioned in the fixed lens which sets and resets on firing. I
think this one was just starting to show the signs with a bit of exposure
inconsistency and mild corner haloing. So with that in mind and a big week at
work with a weather front coming in I didn't bother with a second roll.
I found it nice to use and it sat well around the neck, the front strap
loops pulling the camera tight to my chest with no bounce. All the twiddly
turny things were sure footed and never gave me cause for concern. Aside from 1
or 2 wobbly exposures it hit my marks so a satisfying week which allowed me to
enjoy improving my own skills trouble free.
Hope you enjoy the pics of in and around Plymouth… the arches shots are nice for me as access is usually restricted but someone was slack with the gate. I suspect future development might not give many chances like that again.
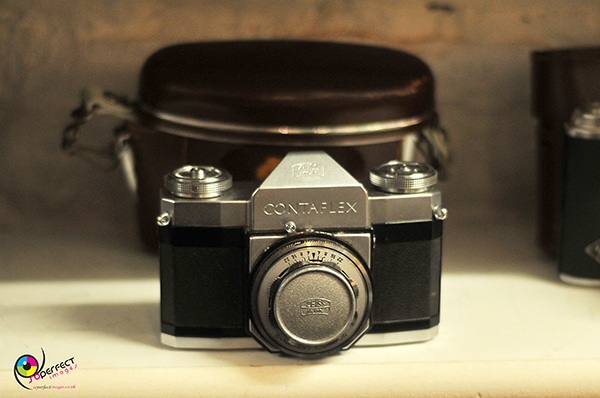
Week 12 – The Ernemann Heag XV
There was never any intention to run this camera for the project. Russell just let me take it home to have a bit of a nosey, however the more I failed to find out about it the more it intrigued me. I found out a 4x6.5 was introduced in 1912. I knew there were many varied configurations thereafter. The 6.5x9 appears to run from 1914 to 1926 out of Dresden Germany. Ernemann-Werke AG post war merging with several companies becoming Zeiss Ikon, the later models then sporting Tessar and such lenses. This has an Anastigmat Ernar f6.8 105mm lens with only Ernemann markings so I assume an early model. Its a folder, with options of multipurpose backs, I only had the plate back with 3 holders, opening the black canvass folding back reveals a ground glass focusing viewer but I found it awful. There is an attachable roll back but this I didn't have the luxury of.
In a bid to improve my exposures i had acquired the spot meter with the intention of exploring the zone system. Sheet film is still available in the size required but at one pound each. I foolhardily decided to cut pieces of 120 and run it as a 6x9... in diary style here, i will keep it short, is my journey of my week.
Sunday – Actually the night before I fashioned a jig and tried cutting 3
frames from FP4 in my dark bag and loaded my first ever holders! I set off in
the morning to shoot 3 images at the river in Plymbridge Woods, it was dark and
exposures were at 1 second on the minute reading plate. Home – develop
appropriately – scan! Bad! Dark, sooo dark! Transpires the shutter had locked
itself at 1/25th. I determined this by ear comparing to my Ikoflex.
Consulting the oracle I had enough detail in the shadows to carry on and give
it a go in aperture priority.
Monday – Having reloaded using a revised Jig to give much straighter
cuts I set off on my general work wanders with the sole intention of just
getting a reasonable starting point exposure wise. First attempt I tried to use
the ground glass again setting the shutter to T but not good I would be opting
for distance finder from now on, I promptly forgot to rest shutter and realised
as I drew the cover plate, I shot anyway, reset and retook properly. The last
one went well until I replaced the plate and the film popped its retainers, a
risk from cutting roll film so I had to live with it! I had low expectations
from the start, it was a 100 yr. old camera full of dust and probable light
leaks! It was a journey…. I processed once more and the oracle was happy with shadow
detail telling me to get out and practice and enjoy.
Tuesday – target was to shoot three frames with no mistakes! First frame
went perfectly until a passer-by engaged me in chat and I forgot to fit my
allowed for filter. I got the next two I thought – process – clearly a holder
had leak issues but I had 3 sort of images, dusty inconsistent but there!
Thursday – I took Wednesday off to test the Rollei and gather knowledge
from the oracle. I would rate film at 100 and give it my best! One just jammed
the cover plate, one leaky holder and the camera itself was showing either a
leak of flare but the results were better! I had one last chance!
Sunday – This morning! I set off to the moors with a single minded
intention of shooting successfully. I took my time, made my notes and took
every care! Once processed I was at first a little disappointed but actually
they aren't that bad.
Thoughts – On reflection I am really happy. Its a 100 yr. old camera
fed with makeshift film, get rid of the dodgy holder, fix the shutter and
possibly source the roll back and it would be fun for project stuff. The lens
isn't great but good enough, it is what it is. I had learned an enormous amount
and had a week of great fun, only touching the very beginnings of the zone
system had put me in a good place thanks to my oracles teachings and as I said
before so much fun was had!
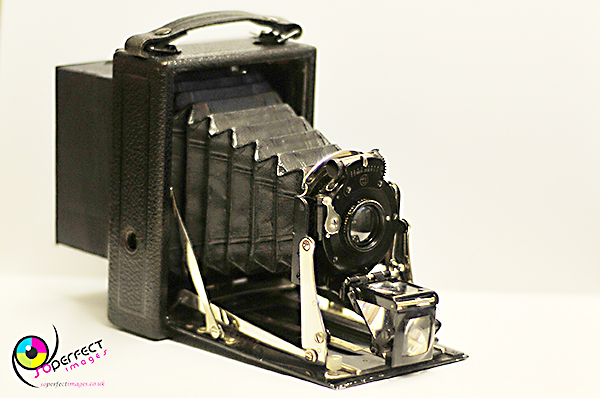
Rolleiflex T1 take 2!
Week 1 revisited
All the way back to week 1 we go, it had been a disappointment to say
the least! I had fought a sickly classic with advance issues. Its now back
from repair and all is well so I took it out for a spin or two to put down some
pics to salvage some pride for it and myself. Using my new spot meter and
implementing my beginners lessons in “the zone system” I found the EV system
that bugged me first time around now useful tool. So, I ran a Delta 3200 rated
at 1600 through first as it was the most expendable to me, it mostly came out
ok with reasonable exposure but I didn't really quite get it right and I don't
much like the grain. Later in the week while taking a day off from week 12s
Ernemann I ran a HP5 I had half a roll of which I was much happier with. Anyway
its all better so hope you enjoy the pictures!
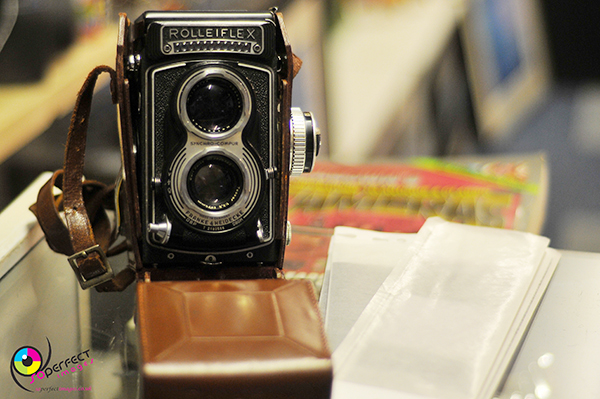
Week 11 The Yashica 44a
I
had some unfinished business with the 127 film cameras so this week I wanted to
pin some of the issues down. Russell thought the Yashica might bring a touch of
class to it and I wasn't going to argue! It was spotless, like new! In the grey
it looked beautiful snuggled in its tanned leather jacket. I took it home and
had a play to familiarise myself with it, I looked at a few reviews and the
Yashikor 60mm lens it had was said to fall short of its big 6x6 brothers
Yashinon but I say there isn't much in it. The 44 was introduced in 58 but was
expensive, the 44a was a cheaper version dropping the iconic filter mounts I
had and advancing with just a knob, this was the only fault I had
with it! Too easy to move on a bit by brushing with your hand or handling etc…
care needed but I got by with two frames just touching but not lost.
Roll
1, a standard Rerapan 100 127 to start off. I planned a Dartmoor excursion, in
particular Burrator reservoir. I was up early on the Sunday to mist and
annoying drizzle but I went anyway and shot from the banks using a tripod and
my old Zeiss meter as there is no on board, limited shutter speeds of 1/25th
to 1/300th + I&B meant I was at 1/25th and ran it as
aperture priority. It cleared up a bit and I enjoyed the day with the Yashi
running faultlessly! I Developed with rodinal to the only times I could find
and for me they have ugly grain and are overexposed.
I
have pulled the exposure back and pushed the blacks in those images!
Roll
2. FP4 35mm re rolled – here we are again! I had a part roll left from last
week and knew if I cut for 12 exposures there would be waste so I marked out 3
extra frames following the originals and rolled it as a 15, idealy a 13 and 14
will just cover a 36 exposure donor, I loaded in dim light and set off on a
city walk taking in the river etc as I do regularly, I had a hood hair banded
on and could slip my rollei filters in behind, I shot some from the tripod,
some hand held and even tied a couple of sideways shots, that is a task I can
tell you! I passed Soperfect images and Russell presented me with a spot meter
so I had a play. Dev'd and scanned I was pleased to see 15 images clean but
that damned bulging of the film effected some of the images again! I am certain
this is just inconsistent tension during rolling so it is all on me, there were
a few nice ones though.
Roll
3. Porta 160 nc, cut and rolled from a
120 – Sprockets are fun and have a valid place but shooting in the format the
camera is designed for 4x4 in this case is preferred for me so I attacked the
internet and quickly found a video showing a 120 being cut down using a cigar
cutter! Immediately purchased. I had a go using an old exposed knackered
roll found in a camera….it was to wobbly, I fashioned a jig from a 35mm
canister and thought I had it so rolled it up
– 13 frames, there is I now know room for 15. I took a wander around the Hooe
side of the river Plym and all went smoothly, I really enjoyed the Yashica, it
was like a love child of my 124g and Ikoflex sharing mixed similarities.
Thankfully it was a nice day and gave me scope to play, even trapping a close
up lens on the bottom and hand holding the top half, it came out which was nice!
Loading the developing tank was a wrestle, it hadn't been perfect cut and I
lost the last frame but I was happy, colour developing is average at best for me
but these were as good as I have done,
So,
to sum up where do I feel this little 127 project is at, sprockets I just need
to find consistent rolling technique, the cut down but 120 is the way forward
for me, a better more permanent jig will be made and we will shoot 127s again
later once I have nailed it down. I think we have made good ground and fine
tuning is all that is required. The Yashica 44a, a great little camera!
Outstanding performance for a basic model only let down by me. Just too close
to the two 6x6s I already have. Its a shame there isn't well priced 127 film
out there as good cameras are just not getting the use they deserve.

Kodak Brownie Reflex
I hinted last week I had given myself a little Christmas hols project so
Russell suggested we double it up with the 52 weeks. This meant however running
2 cameras as he displays that months cameras with a couple of prints from it in
the shop, but it wouldn't really effect anything.
The Kodak Brownie Reflex! A twin lens reflex camera (TLR) from the
40/50s, well - not really a TLR! It's a box brownie, squished and restyled into
a more modern design and the viewing glass expanded to cover the whole top with
a tin pull up door looking down onto a mirror and out of a big viewing lens
with the standard taking lens sitting below it… a posh box brownie!
Why is this personal? Well my son bought it for me, good condition with
its box and flash, I really wanted to run it as he had made a really nice
effort but it eats 127 film hence last weeks delve into rolling my own 35mm. I
had had issues but this was the next step! I struggled with the viewer last
week particularly with sprockets but this was a massive clear bright viewer so
no problem there! 2 strips of black tape to mask off the probable image area
and we were good to go. I had rolled an extra HP5 400 from the week before. Yes it was harsh sun
again but I rigged up a hood that held my light yellow, strong yellow and
orange Rollei filters stretching the fixed F11 aperture and 1/30th
shutter speed to hopefully manageable levels. I ran through the roll at the
Royal William Yard, an historical navy yard now posh flats, bars and old stuff!
All went well till I got to 10 of the 12 4x4 frames. It wouldn't advance any
further, so I had a beer or 2 and drifted home to dev. I unloaded in the changing
bag and had a feel around, the paper had jammed! I figured fixing the film to
the paper at both ends had caused it. I rolled 2 more fixing at just the start,
a cheap colour, an FP4+ and bagged an expired in 1975 Prinzcolor 127 I would
run for fun. I looked at the HP5 results and there was a weird out of focus
distortion in the middle – the film had buckled in the opening throwing out the
focus probably the same reason as the jam.
Day 2 I set off to Russells shop picked up camera 2 and loaded up. It
then got dark… really dark for 1pm, I took a light reading and at the f11 for
200 asa I could only muster 1/15thL. Coffee…think…coffee… light
bulb moment! I abandoned the meter and set about the Barbican and Hoe festooned
with flat surfaces holding down the cameras and attempted double exposing which
should get me the required 1/15th
exposure (1/30th x2). This
was not easy as the plunger is quite aggressive with no cable fitting. Both 35s jammed again at 8 &10, the 127
crackled and popped but ran through easily. I triple exposed on this film for
its expired nature. It was while I was walking home the possible jamming reason
came to me so as soon as I got in I set about stripping out the film and
developing. I looked at the film holder and as I thought it was curved! The
paper was following the curve while the film was short cutting across the void,
they needed to run exactly the same! I developed the film and on the whole they
were ok (the c41 colour – long story but 0 images, my fault somehow I had
loaded already exposed film). Exposure was better overall, as was the centring of
the sprocket shots and the keeper rate of the double exposers surprised me, in
fact their dark smoky look reflected the day nicely. I developed the Prinz roll
as black and white, being c22 it was not ever going to be worth sending off but
came out scratched blotched with weird colour casts and actually strangely
appealing.
I
apologise for the lengthy ramblings but I honestly have skipped over a lot of
detail, I learned so much! I now know to run rolled sprockets in a straight
backed holder! A long frame makes for better sprocket shots and a big viewer
makes life much easier. I can think on my feet and pull images from the most
basic camera in crap conditions and I can only get better ;) …. Bring on more 127s I say!!!
Week 9 – Kodak Vest Pocket Autograph
Week 9's camera came to me just prior to the Christmas holiday and I had
time off booked, I had set myself a little project of personal fun for this
period so hearing this Russell thought the Kodak Vest Pocket would tie in
nicely. To be honest we had tried to run one in week 2 but the expired film we
had was shot so we shelved it. Russell is a passionate folder collector and
offered me several to choose from. I choose this one firstly for its dog eared
appearance which would allow me to get busy with electrical tape without fear
of damage and secondly its lens, this one I discovered after a search was the
U.S design fitted with a speed 8 Rapid Rectilinear lens which sits proud of the
front plate and screws off. I set about giving it a good clean and loaded the
first film – a nice fresh 127 Rerapan 100 Russell had bought, now this is where
my project comes in! Week 10 without giving it away will be 2 cameras exactly
the same but one is mine, a gift from my son but requiring 127 film. Why a
project? The Rerapan came in at £15!!!! For 8 frames!!! So, I was determined to
attempt rolling 35mm into spare 127 spools and backing paper. There are many
instructional sites on the web so won't bore you but I managed to roll a couple
of HP5 successfully.
First chance to shoot was Boxing day, a family walk (roller skate, kids
+ pressies) on the parade on Plymouth hoe, bright low harsh sun meant shooting
would hard with just 2 fixed shutter speeds 1/25th & 1/50th
and 3 marked apertures 8/16/32, the aperture iris though could be seen opening
so I was fairly sure I could estimate some others. I metered using my old 50s
Ziess Ikon, a meter using a different scale (there were many before
standardisation) this uses American Scheiner, I carry a table printed off the
net to cross reference so never discount old meters especially if they are
pretty! This one also meters 1 stop out so I just pre set film speed 1 stop
slower and this is spot on for ME!
I shot through the Rerapan far too quickly, a fashioned hood held on
with rubber bands with the yellow filter it holds I thought would help control
the light, having been extensively used by soldiers in the Great War I shot a
few of the monuments honouring them and even tried (stupidly) a few sunsets.
Once developed it was clear… (a) I had overexposed! (b) The tiny tiny tiny
prism viewer was too small for my bad eye sight and was not particularly
straight, the former I think the main issue. (c) maximum respect for those
soldiers who shot great images in terrible conditions! Bugger! The second roll
was going to be sprockets and would make the frame much tighter! I loaded the
home rolled HP5 and it loaded well, I was able to take advantage of the frame
numbers of the backing paper and it advanced nicely through the whole roll.
Annoyingly another bright day meant selected film was really too fast and I
just never nailed the exposure and as I feared I struggled framing the
sprockets, everything was one sided, to be fair it was my first time so I can only
get better at it. A light leak was evident which didn't bother me, this is to
be expected on a 100yr old camera and once found a bit of tape will cure it.
So, the images below are not the best. Over exposed and wonky. I didn't
straighten and I left in the rough edges in the scans as I like them (I will go
into the scanning next week), there is lots of “vintage” dust from the pumping
of the bellows which is to be expected. The viewer was just too small for me
but I had fun while proving if you have the time and patience (and eyesight)
you can run one of these on 35mm and vital for next weeks camera. ……….hope
both my readers had a good Christmas, hope have a good new year.
Week 8 – Kodak Retina 1B
Here we are at week 8 already! I think this week I need to
start by introducing my partner in crime – Russell Soper, owner of Soperfect
images (nice word play sir!). He worked as a Photographer here in the city
primarily in digital, producing those postcard images and framed prints he sold
through his gallery/shop on the Barbican mostly of the southwest, also private
assignments and as a portrait photographer for local schools. Thats how my wife
met him, he took all my kids photos at the school where she works. Now he won't
mind me saying, as his twitter bio says “stroke survivor”, a life changing
event! Fast forward several months and forced to put down the camera Russell
has directed his attention to his gallery and brought his private passion for
collecting vintage cameras into the shop now buying and selling. He loves them!
A particular passion for Polaroid and all things folding.
The Retina is one of his own, just back from service having
bought it with a stuck shutter, he eagerly threw it at me as he wanted to see
what it could do. I was happy to oblige. Another distance finder from the late
50s, fold away lens sat in a nice chrome trimmed leather case, it was a looker
for sure!
A rare and welcome opportunity found me on the moors with the
sole intention of photography. I loaded with Ilford HP5 B&W and set off
following the old dried up Devonport Leat, once the main water supply for the
old naval town of Devonport, it has miles of interesting features set in
beautiful landscape. It was a little dark, spotting with rain but still a nice
afternoon shooting. I found the EV system really handy and easy to use, the
built in light meter was clear and easy to read and all the twisty ratchety
bits were positioned in a nice flowing way. I even liked the advance being on
the bottom plate. It just felt nice. Roll finished I returned home and developed
it straight away in Ilfosol 3. Problem! Only 16 images! That stuck shutter (in
my opinion) wasn't stuck, something just wasn't catching every time so my guess
a mechanical fault and probably (hopefully) an easy fix with some part loose or
warn. The images themselves were exposed well so no shutter lag and light meter
bang on and everything sharp enough to say I was close enough with my distance
guesses.
Shutter problem accepted I decided for colour only to risk a
Poundland Vista leaving the film speed at 400 to give me a little more
flexibility and popped it in my bag while setting off on my pre-Christmas stock
runs for work. This took me across the River Plym, about a mile from the mouth
(where the city gets its name) and shot a handful of frames by the bridges in
good light with the last of the morning mist disappearing. I could now hear the
shutter missing which was off putting so I decided there was no point investing
time travelling to any specific location. Later that day I took a route walk
into the city, now just trying to burn through the roll, detouring up and over
the Hoe. Just as the wind picked up this coupled with the high tide gave me the
opportunity to try some faster shots of the crashing waves, then emptied the
last few frames walking down to Russell's on the Barbican.
The resulting images that it took were good, nicely focused,
well exposed with good colour even in the dreary weather. Aside from the
missing frames I really enjoyed the experience, easy to use and looks great!
Back to the workshop though Russell, I'm sure it will be fine.

Loading more pages